 Proven Settings Guide
⚡ Quick Start Settings
Looking for the perfect settings for your Anycubic Kobra S1? Start here:
Optimal Temperature Settings
Temperature control is critical for PLA success. The Kobra S1’s all-metal hotend handles PLA efficiently, but precision matters. Understanding PLA characteristics compared to other filaments helps optimize these settings.
Nozzle Temperature: 200-210°C
Recommended starting point: 205°C
This range melts PLA completely without degradation. Lower temperatures (200°C) work for slower prints and reduce stringing. Higher temperatures (210°C) improve layer adhesion for functional parts.
Temperature Tower Testing
Run a temperature tower from 190°C to 220°C in 5°C increments. Look for the temperature where:
- Overhangs print cleanly without drooping
- Bridging spans complete gaps without sagging
- No visible stringing between towers
- Layers bond strongly (snap test)
Bed Temperature: 55-65°C
Sweet spot: 60°C
The flexible magnetic PEI bed on the Kobra S1 works excellently at 60°C. This prevents warping on corners while allowing easy part removal after cooling. Learn more about filament compatibility and bed adhesion.
Ambient Temperature Adjustments:
- Winter/Cold rooms (below 18°C): Increase bed to 65°C to compensate for faster cooling
- Summer/Warm rooms (above 25°C): Reduce to 55-58°C to prevent elephant’s foot
- Enclosed printing: 55°C sufficient with stable chamber temperature
Cooling: 100% After First Layer
Run part cooling fan at maximum speed from layer 2 onwards. PLA benefits from aggressive cooling to prevent heat creep and improve overhangs. First layer uses 0% fan for proper bed adhesion.
Print Speed and Layer Height
The Kobra S1’s CoreXY kinematics excel at high speeds, but PLA quality benefits from balanced settings. When comparing against competitors like the Creality K1C or Bambu A1, these settings deliver optimal results.
Print Speed: 50-100mm/s
- 60mm/s: Ideal starting point balancing quality and speed
- 80-100mm/s: Possible for simple geometric prints after calibration
- 40-50mm/s: Detailed miniatures, text, or intricate overhangs
Layer Height: 0.12-0.28mm
- 0.2mm: Universal standard for most prints
- 0.12-0.16mm: Fine details, smooth curves, miniatures
- 0.28mm: Fast prototypes, low-detail functional parts
Retraction Settings
- Distance: 6mm (direct drive system)
- Speed: 40-50mm/s
- Minimum travel: 1.5mm to avoid unnecessary retractions
Complete Settings Reference Table
| Setting | Recommended Value | Notes |
|---|---|---|
| Nozzle Temperature | 200-210°C (205°C optimal) | Brand-specific adjustments below |
| Bed Temperature | 55-65°C (60°C optimal) | Adjust ±5°C for ambient temperature |
| Print Speed | 60mm/s (50-100mm/s range) | Start conservative, increase gradually |
| Layer Height | 0.2mm standard | 0.12mm fine, 0.28mm fast |
| Retraction Distance | 6mm | Direct drive optimized |
| Retraction Speed | 40-50mm/s | Test with retraction tower |
| Walls (Perimeters) | 3 | 2 minimum for strength |
| Infill Density | 10-15% grid | 20% for functional parts |
| Top/Bottom Layers | 4 | Ensures solid surfaces |
| Extrusion Width | 0.42mm | 0.4mm nozzle standard |
| Cooling Fan | 100% after layer 1 | 0% on first layer only |
Filament Brand Settings Guide
Different PLA brands require slightly different settings. Here are tested configurations for popular filaments. For comprehensive filament comparisons, check our 45 best filaments guide and ultimate filament tier list.
Nozzle: 210°C
Bed: 65°C
Speed: 70mm/s max
Notes: Higher temps needed for improved layer adhesion. Excellent strength for functional prints. Minimal stringing. See our top 5 filaments for more premium options.
Nozzle: 200°C
Bed: 60°C
Speed: 80mm/s capable
Notes: Runs cooler than others. 205°C causes excessive oozing. Best surface finish at lower temps. Compare printer performance with this filament.
Nozzle: 215°C
Bed: 60°C
Speed: 60mm/s
Retraction: 50mm/s
Notes: Requires faster retraction speed. Slightly higher temp for vibrant colors. Premium consistency. Works great on the Kobra S1 vs Prusa MK4.
Nozzle: 205-210°C
Bed: 60°C
Speed: 65mm/s
Notes: Standard settings work well. Slight toughness advantage. Good budget option with consistent diameter. Featured in our affordable bulk PLA guide.
Nozzle: 200-205°C
Bed: 58°C
Speed: 60mm/s
Notes: Reliable standard PLA. Some color variation between spools. Lower bed temp prevents warping.
Nozzle: 205°C
Bed: 60°C
Speed: 65mm/s
Notes: Cardboard spools eco-friendly but require dry box. Standard settings optimal. Good price-performance ratio.
Advanced Slicer Configuration
Recommended Slicers
- Cura 5.8: Download Anycubic Kobra S1 profile from Marketplace
- PrusaSlicer 2.8: Use generic CoreXY profile, adjust bed size to 250x250mm
- OrcaSlicer 2.2: Excellent for comparing settings between different Anycubic models
Enable These Features
- Scarf Seam: Distributes z-seam for cleaner surfaces
- Arachne Wall Generator: Superior wall quality, especially on curved surfaces
- Arc Welder: Reduces gcode file size, smoother curves
- Adaptive Layer Height: Automatic optimization for curved surfaces
⚠️ Common Mistakes to Avoid
- Overheating: Nozzle temps above 220°C degrade PLA causing brittleness and discoloration
- Wet Filament: PLA absorbs moisture causing popping sounds and poor layer adhesion. Dry at 45°C for 6 hours if stored improperly
- Bed Leveling: Even with auto-leveling, verify first layer with paper test. Update mesh after any bed adjustments
- Wrong Retraction: Using Bowden tube settings (7-8mm) on this direct drive causes jams. Keep at 6mm
- Inconsistent Cooling: Partial fan speeds create uneven layer cooling. Use 0% or 100%, nothing between
- Skipping Calibration: Every filament brand behaves differently. Run test prints when switching
💡 Pro Tips for Perfect Prints
- First Layer Test: Print a single-layer square before full prints. Should be smooth, not translucent (too close) or with gaps (too far)
- Filament Management: Store PLA in sealed containers with desiccant. Even “dry” PLA degrades in humid environments within weeks. Check our silk PLA guide for specialty filament care
- Regular Maintenance: Clean nozzle every 5-10 prints with cold pull method. PLA residue accumulates even without visible clogging
- Calibration Routine: Run temperature tower, retraction test, and flow calibration when switching filament brands or colors
- Document Your Settings: Keep a log of successful settings for each filament brand and color
Troubleshooting Guide
Stringing Between Parts
- Lower nozzle temperature by 5°C increments
- Increase retraction distance to 6.5mm (max 7mm)
- Enable “Combing” mode in slicer
- Dry filament – moisture is #1 stringing cause
Poor Layer Adhesion
- Increase nozzle temperature by 5-10°C
- Slow print speed to 40-50mm/s for test
- Verify part cooling isn’t too aggressive on thin walls
- Check for drafts affecting print temperature
Warping Corners
- Increase bed temperature to 65°C
- Add brim or raft in slicer (5-8mm brim width)
- Ensure bed is clean (IPA wipe before prints)
- Check for drafts – close windows near printer
Ringing/Ghosting Artifacts
- Reduce print speed to 60mm/s or lower
- Ensure printer is on stable, solid surface
- Check belt tension – should be tight but not overtightened
- Verify no loose screws or mechanical issues
Winter vs Summer Printing Adjustments
Winter (Below 18°C Ambient)
- Bed: 65°C (increase 5°C from standard)
- First layer speed: 20mm/s (slower for adhesion)
- Enclosure recommended for large prints
- Preheat bed for 5 minutes before printing
Summer (Above 25°C Ambient)
- Bed: 55-58°C (reduce to prevent elephant’s foot)
- Increase cooling fan to maximum immediately
- Watch for heat creep in hotend – PLA may soften early
- Reduce print speed by 10-20% if layers shift
📋 Pre-Flight Checklist
Before starting any print, verify:
- ✓ Bed cleaned with IPA (isopropyl alcohol)
- ✓ Bed mesh calibrated and up to date
- ✓ Filament dry and loading smoothly
- ✓ Nozzle cleaned (no residue visible)
- ✓ Correct slicer profile loaded
- ✓ First layer test printed successfully
- ✓ Print file sliced with correct settings
Conclusion: Dialing In Your Perfect Settings
The Anycubic Kobra S1 delivers exceptional PLA print quality when properly configured. Whether you’re deciding between the S1 Combo or Kobra 3 Combo, or comparing against the Kobra 3 Max, these settings provide a solid foundation.
Start with the baseline settings provided – 205°C nozzle, 60°C bed, 60mm/s speed – then fine-tune based on your specific filament brand and environmental conditions. For those considering alternatives, check our comparison with the QIDI Plus4 or the comprehensive three-way comparison.
Remember that PLA is sensitive to moisture and temperature variations. Store filament properly, adjust for seasonal changes, and run calibration tests when switching brands. The investment in proper calibration pays off with consistent, high-quality prints every time.
If you’re exploring different Anycubic models, read about the Kobra 3 Combo vs S1 Combo differences and our S1 vs A1 Combo review.
Next steps: Download the latest slicer profile for your software, run a temperature tower test with your specific PLA brand, and start with conservative settings before pushing speeds higher. Document what works for your setup.
🚀 Ready to Print Perfectly?
Start with these exact settings tonight and see the difference. Share your results and any adjustments that worked for your specific setup.
Related posts:
 Anycubic Kobra S1 vs Bambu A1: Why I Chose the Kobra S1 for My Home Projects
  Top 20 Profitable 3D Printed Products to Sell
  How Long Does 3D Printing Take? A Beginner’s Guide to Print Times
  Can I Become a Billionaire from 3D Printing?
  ELEGOO Neptune 4 Plus vs Creality Ender 3 V3 Plus
  Is a Home 3D Printer Worth It? 10 Home 3D Printer Disadvantages!
  Discover the Prusa CORE One: Your Next 3D Printing Adventure Awaits!
  Elegoo Centauri Carbon: The Best High-Speed CoreXY 3D Printer You Need Now!
  What is the Best Multi-Material 3D Printer?
  Top 5 Reasons to Buy the Elegoo Neptune 4 Plus in 2025 (And 2 Reasons Not To)
  Your First 3D Printer: Elegoo Neptune 4 Pro vs Creality Ender 3 V3 KE (2025 Review)
 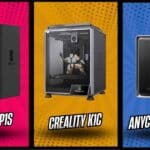 Bambu Lab P1S vs Creality K1C vs Anycubic Kobra S1: Which Enclosed Printer is Best for ABS, Nylon & PETG? (2025 Deep Dive)