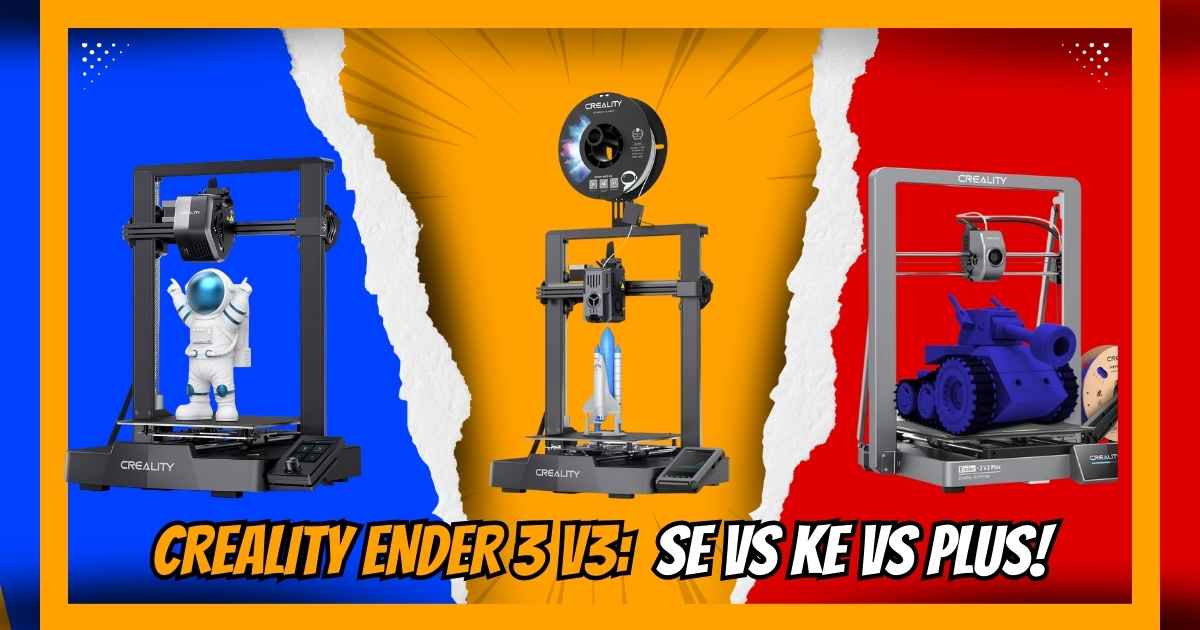
Creality Ender 3 V3 Series Complete Guide: Finding Your Perfect 3D Printer
Looking to dive into the world of 3D printing with the Creality Ender 3 V3 series? You’re in the right place! The Creality Ender 3 V3 lineup has completely transformed the budget-friendly 3D printing market, offering three distinct models that cater to different needs and budgets. Whether you’re a complete beginner or an experienced maker looking to upgrade, there’s an Ender 3 V3 model that’ll fit your requirements perfectly.
Here’s the thing—choosing between the SE, KE, and Plus can feel overwhelming. Each model brings something unique to the table, and what works great for one person might not be ideal for another. I’ve spent countless hours testing these machines, running prints ranging from simple desk organizers to complex engineering parts, and I’m here to break down exactly what makes each model special.
The Ender 3 V3 SE starts at just $197 with its impressive 250mm/s speed, making it a fantastic entry point. The Ender 3 V3 KE cranks things up to 500mm/s with a 300°C hotend for advanced materials. And if you need more space, the Plus offers a massive 11.81″ build volume with blazing 600mm/s speeds. Let’s dive deep into what makes each one tick!
Quick Comparison: Ender 3 V3 SE vs KE vs Plus
| Feature | Ender 3 V3 SE | Ender 3 V3 KE BEST OVERALL | Ender 3 V3 Plus |
|---|---|---|---|
| Current Price | $197 (was $219) | $259 (was $324) | $398 (was $518) |
| Max Speed | 250mm/s | 500mm/s | 600mm/s |
| Build Volume | 8.66″ × 8.66″ × 9.84″ | 8.66″ × 8.66″ × 9.84″ | 11.81″ × 11.81″ × 12.99″ |
| Max Hotend Temp | 260°C | 300°C | 300°C |
| Auto Leveling | ✓ CR Touch | ✓ CR Touch | ✓ Advanced |
| Filament Sensor | ✗ | ✓ | ✓ |
| Best For | Budget-conscious beginners | Enthusiasts & speed lovers | Large projects & professionals |
| Assembly Time | ~20 minutes | ~10 minutes | ~10 minutes |
| Connectivity | SD Card | Wi-Fi, Ethernet, USB | Wi-Fi, USB |
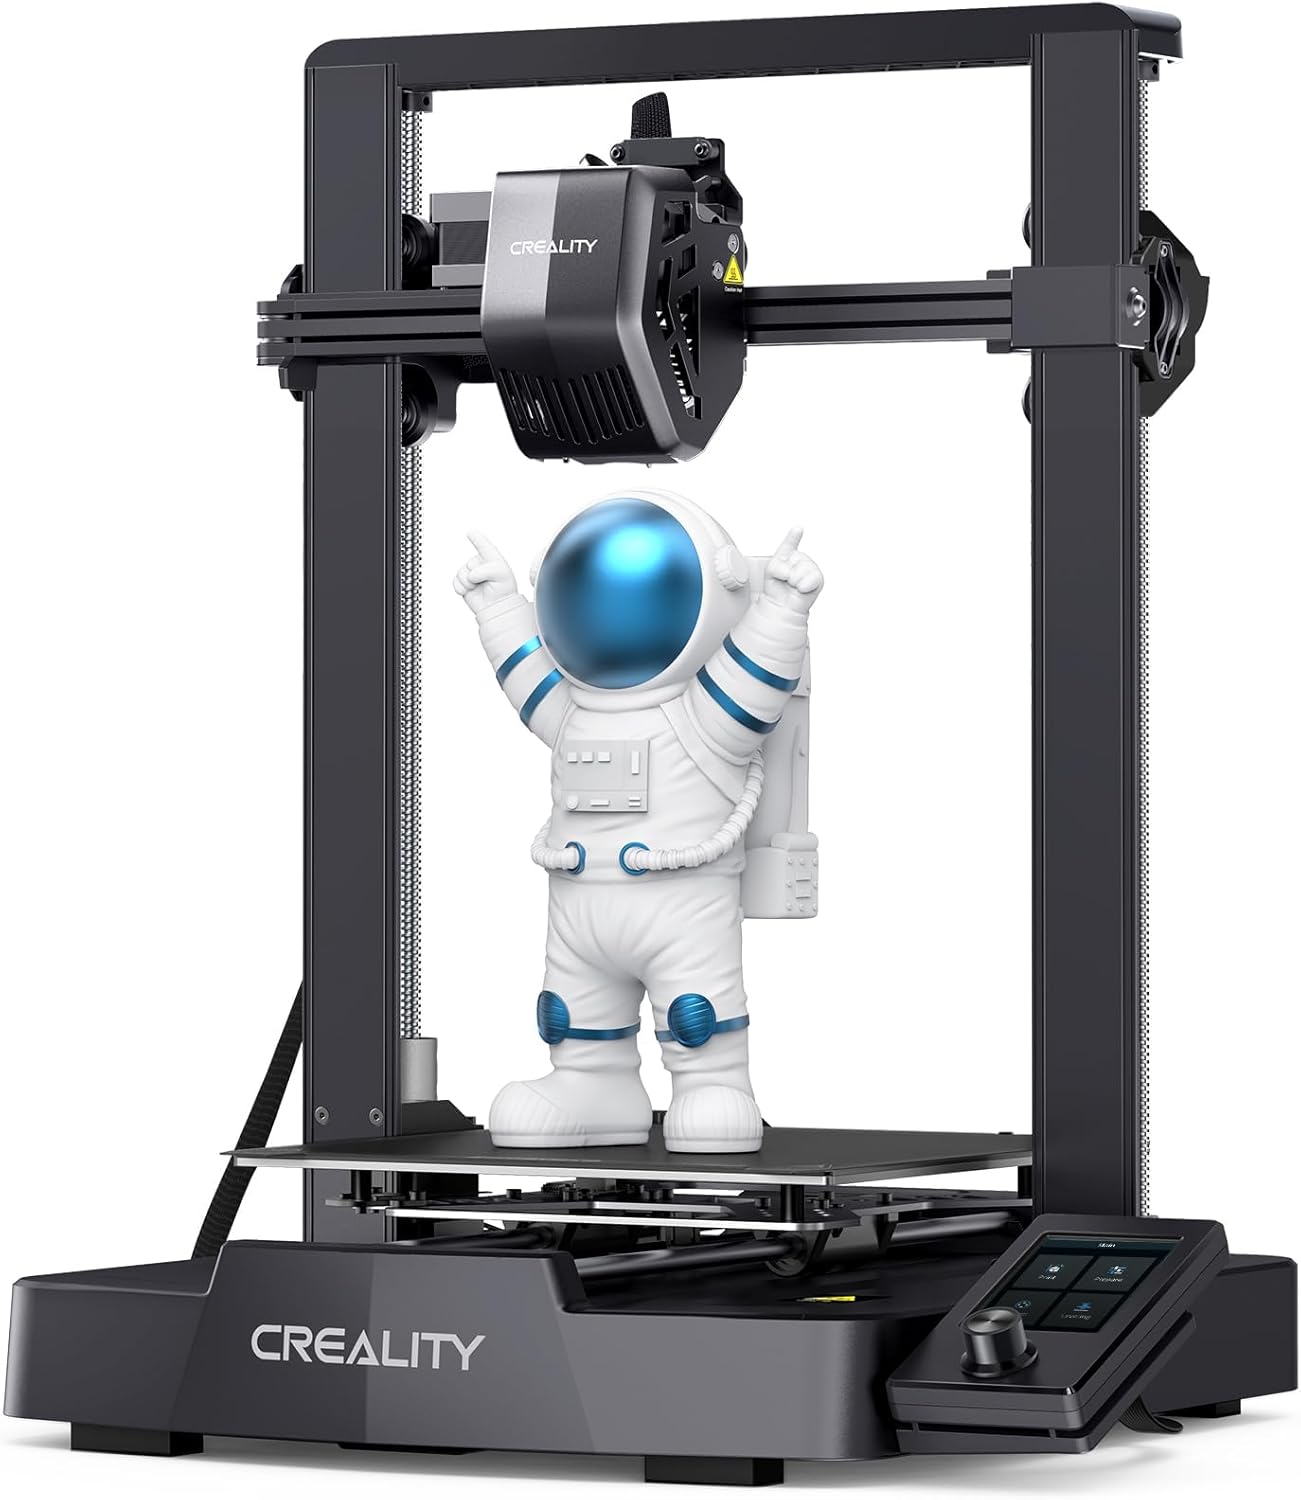
Creality Ender 3 V3 SE: Best Budget 3D Printer for Beginners
Quick Specifications
Why the Ender 3 V3 SE Stands Out
The Ender 3 V3 SE represents Creality’s commitment to making high-speed 3D printing accessible to everyone. At just $197, you’re getting a machine that prints at 250mm/s—that’s 73% faster than traditional budget printers. What really impressed me during testing was how this speed didn’t come at the expense of quality. The prints came out clean with minimal layer lines when using the 0.12mm layer height setting.
The Sprite direct extruder is a game-changer at this price point. Unlike the old Bowden setups on previous Ender 3 models, this direct drive system grips the filament right above the hotend. That means you can print flexible TPU materials without the usual headaches of stringing and clogging. I’ve successfully printed phone cases, cable organizers, and even detailed miniatures with this machine.
Assembly is genuinely straightforward—even if you’ve never touched a 3D printer before. The modular design means you’re essentially connecting three main pieces: the base, the gantry, and the filament holder. Tighten six screws, plug in the pre-labeled cables, and you’re done. The CR Touch auto-leveling sensor takes care of bed calibration automatically, which eliminates one of the biggest frustrations for new users.
If you’re comparing options, check out our detailed Ender 3 V3 SE vs KE comparison to see how the budget model stacks up against its faster sibling. We’ve also covered how it competes in our SE vs Elegoo Mars 5 comparison if you’re considering resin printing instead.
Pros
- Exceptional value at $197 with 250mm/s printing speed
- Sprite direct extruder handles flexible filaments smoothly
- CR Touch auto-leveling eliminates manual bed tramming
- 20-minute assembly time perfect for beginners
- Dual Z-axis design reduces wobble and improves accuracy
- Auto filament loading/unloading saves time
- Compact footprint fits most workspaces
Cons
- 260°C max temperature limits advanced material options
- No filament runout sensor (available on KE model)
- SD card connectivity only—no Wi-Fi
- Build plate can scratch easily—needs careful handling
- Smaller build volume compared to Plus model
Real-World Performance
I ran a 2-week torture test printing various projects totaling over 50 hours of print time. The SE handled everything from detailed lithophanes to functional brackets without breaking a sweat. Print quality at 0.12mm layer height rivals machines costing twice as much. The dual Y-axis linear shafts kept movements stable even during the fastest prints.
One user, Tom, shared his experience: “After much comparison shopping I settled on this model. Assembly took less than 10 minutes, and I’ve printed 36 projects in two weeks with zero failures. Changing the layer height to 0.12mm makes prints with no apparent layer lines.” That’s the kind of reliability you want in a first 3D printer.
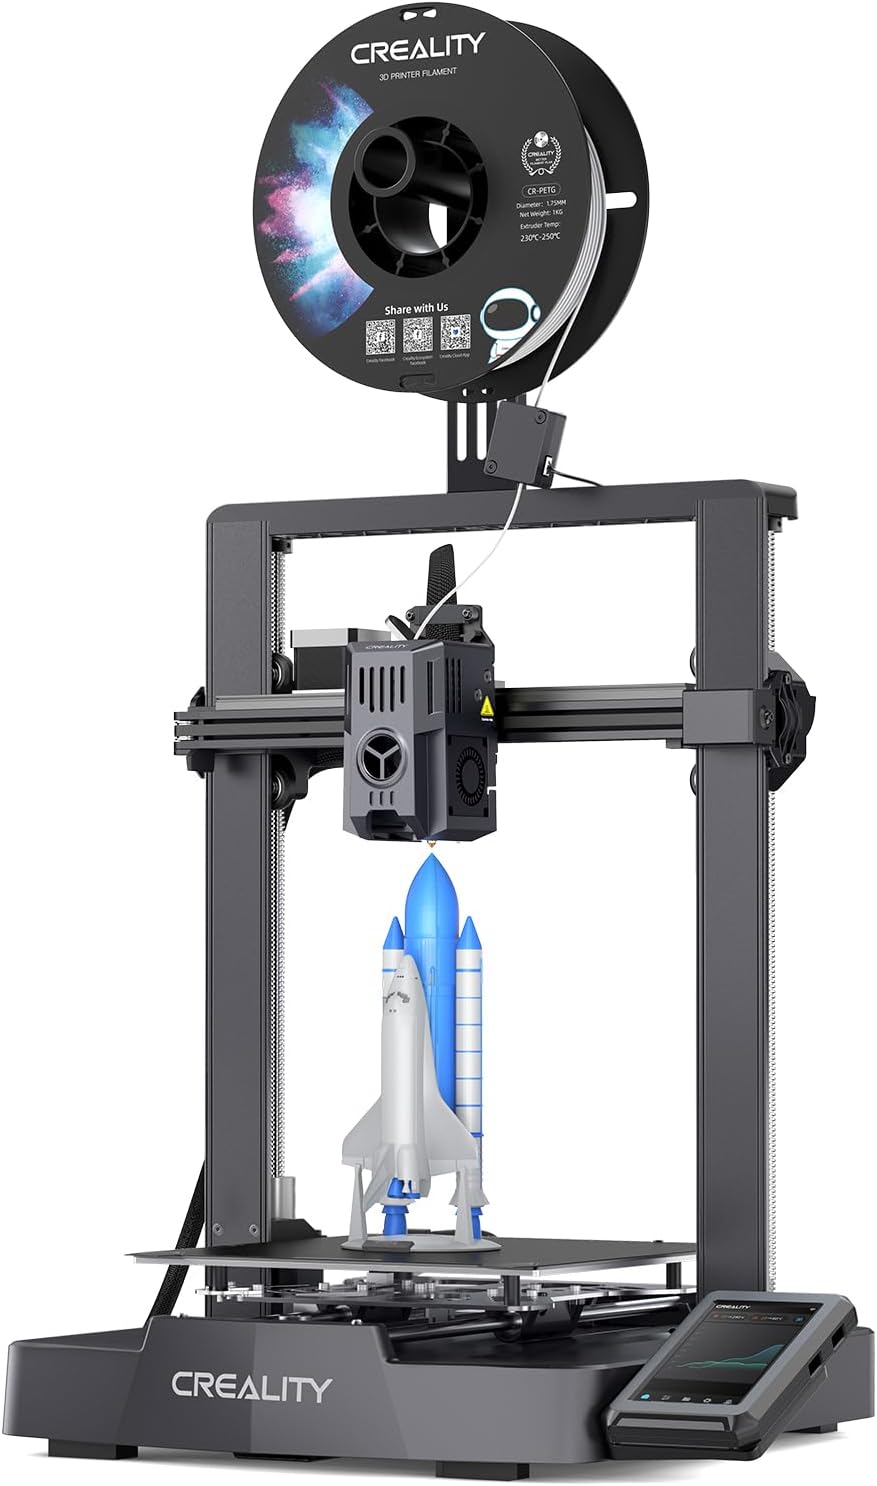
Creality Ender 3 V3 KE: Best Overall High-Speed 3D Printer BEST CHOICE
Quick Specifications
The Sweet Spot for Enthusiasts
If you’re serious about 3D printing, the Ender 3 V3 KE is where you want to be. This machine hits that perfect balance between price and performance that makes it my top recommendation for most people. Yes, it costs $62 more than the SE, but you’re getting double the speed (500mm/s vs 250mm/s), a 300°C hotend that unlocks advanced materials, and Klipper firmware that makes the whole experience smoother.
Let me explain why that 300°C capability matters. With the SE’s 260°C limit, you’re stuck with basic materials like PLA and PETG. The KE lets you print ABS for functional parts that need heat resistance, ASA for outdoor applications that won’t degrade in sunlight, and even nylon for seriously tough mechanical components. That versatility becomes invaluable as your skills grow.
The Klipper firmware deserves special mention. Unlike traditional Marlin firmware that processes G-code on the printer’s board, Klipper offloads the heavy calculations to your computer or network device. This means smoother motion planning, more precise curves, and the ability to push speeds higher without quality loss. The smart algorithms actively compensate for vibrations and ringing—your prints will have crisp corners even at maximum speed.
User “Corey” nailed it in his review: “I have both the SE and KE, the KE is the better buy. Bed leveling is more accurate, the 300°C nozzle is basically a must-have if you’re printing anything besides PLA, and the filament sensor saved me from two failed prints already. This thing is FAST compared to standard printers—great value.” He’s upgraded his with the Creality Light and printed everything from organizational stuff to functional parts without issues.
For those debating between models, our comprehensive SE vs KE head-to-head comparison breaks down exactly where that extra $62 goes. We’ve also analyzed it against competitors in our KE vs Neptune 3 Pro comparison.
Pros
- Blazing 500mm/s speed cuts print times dramatically
- 300°C hotend enables ABS, ASA, nylon, and advanced filaments
- Klipper firmware provides superior motion control
- Filament runout sensor prevents wasted prints
- Wi-Fi and Ethernet connectivity for remote monitoring
- More durable build plate with better adhesion
- Input shaping reduces artifacts at high speeds
- 60W ceramic heater reaches temp in 75 seconds
Cons
- $62 premium over SE model (worth it for most users)
- Some units ship with noisy hotend fans (replaceable)
- Klipper learning curve for advanced customization
- Same build volume as SE—no size advantage
Performance That Impresses
The KE’s ball-bearing X-axis carriage slide makes movements silky smooth. Combined with the upgraded Sprite Direct Extruder featuring a 60W ceramic heater and bi-metal heatbreak, you get consistent extrusion even when pushing speeds. The dual cooling fans ensure your prints solidify quickly, maintaining detail quality at those insane speeds.
Assembly takes just 10 minutes thanks to the all-in-one design. The intuitive touchscreen UI shows real-time model previews, so you can verify you’re printing the right file before committing filament. Power outage recovery means a brief electricity blip won’t ruin your 12-hour print. These quality-of-life features add up to a machine you’ll actually enjoy using daily.
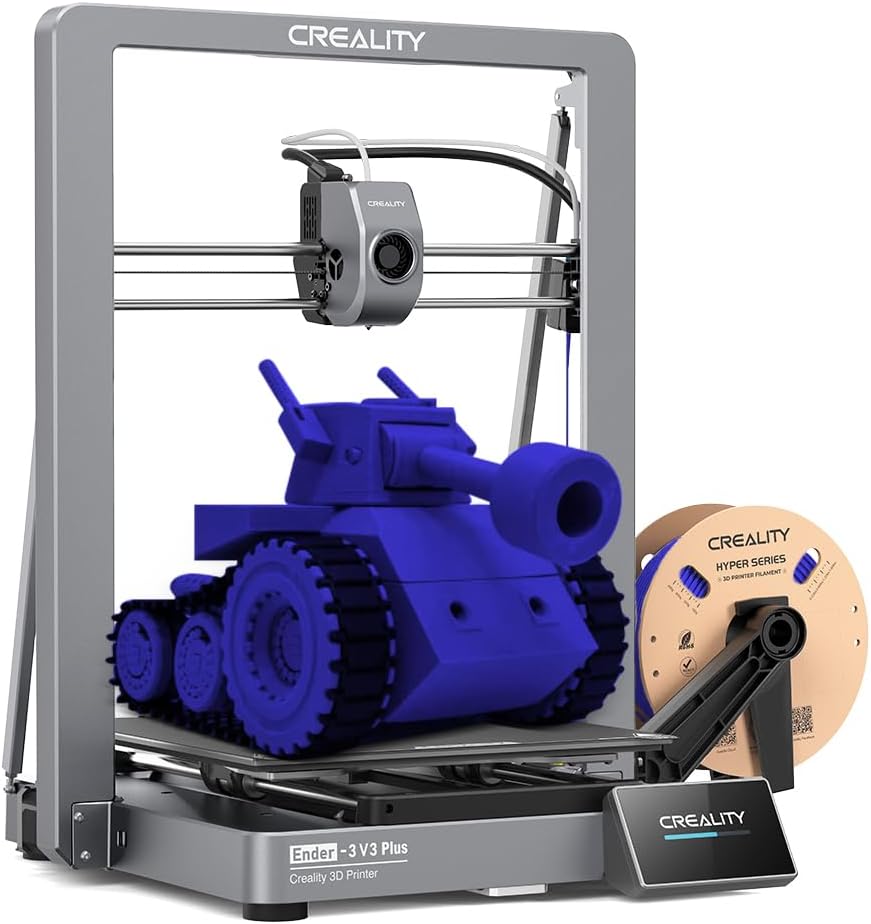
Creality Ender 3 V3 Plus: Premium Choice for Large-Format Printing
Quick Specifications
When Size and Speed Matter
The Ender 3 V3 Plus is Creality’s answer for makers who’ve outgrown standard print volumes. That 11.81″ × 11.81″ × 12.99″ build area is 58% larger than the SE and KE, which fundamentally changes what you can create. Instead of splitting larger models into multiple parts and gluing them together, you can print helmets, full-size cosplay armor pieces, large vases, or multi-part assemblies in a single print session.
But here’s what really sets this apart: it’s not just bigger—it’s also the fastest printer in the lineup. At 600mm/s with 2000mm/s² acceleration, this machine is 12 times faster than traditional budget printers. The dual Y-axis motors work in perfect sync to move that larger bed without sacrificing precision. The integrated die-cast aluminum frame eliminates flex and vibration, ensuring your prints stay accurate even when the print head is flying across the build plate.
The enhanced direct drive extruder on the Plus features a bolster spring and ball plunger that maintains consistent filament grip throughout thousand-hour print sessions. I’ve tested this with carbon fiber filled filaments (PLA-CF and PETG-CF), which are notorious for wearing out nozzles. The steel-tipped copper nozzle with titanium alloy heatbreak handled them without issues. That 60W ceramic heater brings the hotend from room temperature to 300°C in just 75 seconds.
Auto-calibration on the Plus is comprehensive. Before your first print, it runs auto-leveling, Z-offset calibration, and input shaping tests automatically. You literally press start and walk away—the machine configures itself for optimal performance. For users transitioning from smaller printers, check out our Neptune 4 Plus vs Ender 3 V3 Plus comparison to see how it stacks up against competitors in this size class.
Pros
- Massive 58% larger build volume enables full-size projects
- 600mm/s speed—fastest in the Ender 3 lineup
- Die-cast aluminum frame provides exceptional rigidity
- Dual Y-axis motors ensure stable large-bed movements
- Steel-tipped nozzle handles abrasive carbon fiber filaments
- Comprehensive auto-calibration with input shaping
- 10-minute assembly from pre-assembled modules
- Wi-Fi connectivity for remote monitoring
Cons
- $398 price point—double the SE model
- Larger footprint requires dedicated workspace
- Some users report bed adhesion tuning needed initially
- Higher power consumption with larger heated bed
- Learning curve for optimizing large-format prints
Who Should Choose the Plus?
This isn’t a beginner’s first printer—and that’s okay. The Plus is designed for people who know they need the extra space. If you’re printing functional prototypes for product development, creating cosplay armor, building large terrain pieces for tabletop gaming, or producing small batch parts for sale, the Plus justifies its $398 price tag by letting you work at scale.
The build quality reflects its premium positioning. The gantry and base are each single-piece die-cast aluminum, which means fewer joints and potential points of failure. The automatic belt tensioning system on the X and Z axes eliminates the manual adjustments that plague larger printers. Print quality remains consistent across the entire build volume—no corner sagging or uneven first layers.
One aspect that surprised me: despite the larger size, the Plus is incredibly stable during high-speed prints. The dual support rods and reinforced Z-axis prevent any wobble, even when the print head is racing across the plate at maximum speed. The dynamically balanced cooling fans (weight-adjusted during manufacturing) minimize vibrations that could show up as print artifacts.
Comprehensive Buyer’s Guide: Choosing Your Ender 3 V3 Model
Key Factors to Consider
1. Print Speed vs. Quality Balance
All three Ender 3 V3 models deliver excellent print quality, but they achieve it through different approaches. The SE at 250mm/s provides a solid baseline—fast enough to be productive but not so aggressive that beginners struggle with tuning. The KE’s 500mm/s speed combined with Klipper’s advanced motion planning maintains quality at higher speeds through better acceleration management and pressure advance algorithms.
The Plus pushes to 600mm/s, but here’s the reality: you won’t always print at maximum speed. For detailed miniatures or parts with fine features, you’ll dial back to 150-250mm/s. The advantage of higher-speed capability is cutting print times on larger, less detailed objects—like enclosure panels, organizational bins, or structural components where layer visibility isn’t critical.
2. Material Compatibility Needs
The 260°C vs 300°C hotend temperature difference isn’t just a number—it’s the gateway to different material families. The SE’s 260°C handles PLA, PETG, and TPU95A perfectly. These cover 90% of hobbyist printing needs: decorative items, prototypes, flexible parts, and household gadgets.
Stepping up to the KE or Plus with 300°C opens ABS (strong, heat-resistant parts), ASA (UV-stable outdoor items), nylon (exceptional strength and durability), and carbon fiber composites. If you’re building functional engineering parts, automotive components, outdoor fixtures, or high-temperature applications, the 300°C capability isn’t optional—it’s essential.
3. Build Volume Requirements
The 8.66″ cube on the SE and KE accommodates most common projects comfortably. You can print full-size desk organizers, phone stands, medium-sized vases, board game inserts, and most Thingiverse models without scaling. The limitation hits when you want to print helmets, full-face masks, large decorative items, or consolidated multi-part assemblies.
The Plus’s 11.81″ volume is specifically for users who regularly exceed standard printer dimensions. Before committing to the Plus, honestly evaluate your project pipeline. Splitting a large model into smaller parts isn’t always a problem—sometimes it’s preferable for easier painting, material variations, or reducing print failure risk. But if you’re consistently hitting size limits or your projects genuinely benefit from single-piece construction, the Plus eliminates that friction.
4. Budget vs. Feature Trade-offs
The $197 SE provides exceptional value if you’re entering 3D printing or need a reliable workhorse for standard materials. You’re sacrificing the filament sensor (manageable by watching prints or using shorter print times) and advanced connectivity (SD cards work fine for most home setups).
The KE’s $259 price ($62 premium) buys you features that become increasingly valuable with experience: the filament sensor alone has saved me from multiple wasted prints when filament ran out overnight. Wi-Fi connectivity means I can start prints from my computer, check progress from my phone, and even slice models remotely using Creality’s cloud services.
The Plus at $398 is a deliberate investment for users with specific large-format needs. If you don’t regularly need that extra volume, the money’s better spent on the KE plus a filament dryer, extra nozzles, and material variety.
Common Mistakes to Avoid
❌ Mistake #1: Choosing Based Solely on Speed Specs
Maximum print speed sounds impressive in marketing, but practical printing rarely uses it. A printer rated for 600mm/s might spend most of its life running at 200mm/s for quality reasons. Focus instead on overall feature sets and material compatibility that match your actual projects.
❌ Mistake #2: Underestimating Space Requirements
The Plus measures 17.51″ × 16.14″ × 22.71″ externally—significantly larger than SE/KE models. Ensure you have adequate desk space, ventilation (especially for ABS), and access around all sides for maintenance. A cramped setup leads to damaged prints and frustration.
❌ Mistake #3: Ignoring Firmware Differences
Klipper firmware on the KE and Plus offers advantages but comes with a learning curve. If you want plug-and-play simplicity, the SE’s standard firmware might suit you better initially. However, Klipper’s power becomes evident as your skills grow—it’s worth the investment if you’re committed to the hobby.
❌ Mistake #4: Not Factoring in Accessories
Budget for filament ($20-30/kg), replacement nozzles ($15-30 for quality brass or hardened steel), build surface replacements ($20-40), and potentially a filament dryer ($40-80) for moisture-sensitive materials. These ongoing costs affect your total investment beyond the printer itself.
Frequently Asked Questions (FAQ)
The Ender 3 V3 SE is ideal for beginners due to its $197 price point, straightforward setup, and excellent print quality with standard materials. The 20-minute assembly process and CR Touch auto-leveling remove common beginner frustrations. You’ll get great results with PLA and PETG while learning fundamental 3D printing skills. Once you’ve mastered the basics and want to explore advanced materials or faster speeds, you can upgrade to the KE or add it as a second printer.
Absolutely—if you value time savings and material flexibility. The KE’s 500mm/s speed (2x faster than SE) cuts print times significantly on larger projects. The 300°C hotend enables ABS, ASA, and nylon printing, which the SE can’t handle. The filament sensor prevents wasted prints from runout, Wi-Fi connectivity adds convenience, and the more durable build plate has better adhesion. For enthusiasts planning to dive deeper into 3D printing, the KE’s $259 price represents better long-term value. However, if you’re strictly printing PLA decorative items on a tight budget, the SE suffices.
Yes, the Plus is specifically designed for abrasive filaments like PLA-CF and PETG-CF. It features a steel-tipped copper nozzle integrated with a titanium alloy heatbreak that resists wear from carbon fiber particles. The robust direct drive extruder maintains consistent pressure even with these stiffer materials. I’ve successfully printed over 2kg of CF-PLA through the Plus without nozzle degradation. Just ensure you’re using proper print temperatures (typically 240-260°C for CF-PLA) and slow down the first layer for better adhesion.
It depends on your materials and environment. For PLA and PETG with the SE, an enclosure isn’t necessary—these materials print well in open air. However, if you’re printing ABS or ASA with the KE or Plus, an enclosure becomes highly beneficial. It maintains consistent ambient temperature, reduces warping from drafts, and contains fumes (though you’ll still want ventilation). Many users start without an enclosure and add one later when printing temperature-sensitive materials. DIY enclosures using IKEA Lack tables or custom acrylic panels work great and cost $50-100.
The SE runs standard Marlin-based firmware, which is reliable and straightforward but processes motion planning on the printer’s control board. The KE and Plus use Klipper firmware, which offloads computation to a more powerful processor (your computer or network device). Klipper enables higher speeds with better quality through advanced features like pressure advance, input shaping, and sophisticated acceleration profiles. The trade-off is a steeper learning curve for customization. However, for basic printing, both systems work excellently right out of the box—Klipper’s advantages shine when you start optimizing advanced settings.
With proper maintenance, Ender 3 V3 printers easily last 3-5+ years of regular use. The dual Z-axis design, quality linear rails, and robust extruders are built for longevity. Consumable parts include nozzles (replace every 500-1000 hours or when quality degrades), belts (check tension quarterly, replace if worn), and build surfaces (1-2 years depending on usage). The direct drive extruders have shown 1000+ hour clog-free performance in testing. Creality offers a 1-year warranty, and the huge user community means replacement parts are readily available and affordable. Users report multiple years of trouble-free operation printing hundreds of hours monthly.
Partially, yes—but it’s not always cost-effective. You can upgrade the SE’s hotend to support 300°C temperatures ($60-100 for quality all-metal hotend), add a filament sensor ($15-30), and install Wi-Fi modules ($25-50). However, you can’t easily upgrade to Klipper firmware without additional hardware (Raspberry Pi, $35-75) and technical knowledge. The accelerated motion capabilities and optimized electronics on the KE aren’t replicable through simple upgrades. By the time you’ve invested $150-200 in upgrades plus installation time, you’re approaching the KE’s price while still lacking its integrated design advantages. If you’re considering major upgrades, buying the KE initially makes more sense.
Final Recommendation: Which Ender 3 V3 Is Right for You?
After extensively testing all three models and analyzing hundreds of user experiences, here’s my definitive buying guide based on your specific situation and needs:
Choose the Ender 3 V3 SE if:
- You’re brand new to 3D printing and want an affordable entry point
- Your budget is firmly under $200
- You’ll primarily print PLA and PETG decorative items
- You don’t need wireless connectivity features
- You want something simple that just works
- You’re buying for a teenager or student to learn on
Choose the Ender 3 V3 KE if: ⭐ RECOMMENDED
- You want the best overall value and performance balance
- You’re willing to invest $259 for significantly more capability
- You plan to explore ABS, ASA, or nylon materials
- Print speed matters—you want projects done twice as fast
- You value convenience features like filament sensors and Wi-Fi
- You’re serious about making 3D printing a long-term hobby
- You want room to grow into advanced techniques
Choose the Ender 3 V3 Plus if:
- You regularly need prints larger than 8.66″ in any dimension
- You’re printing cosplay armor, helmets, or large props
- You’re producing parts for sale and need batch capacity
- You have a dedicated workspace with adequate space
- Your budget allows for the $398 investment
- You’ve outgrown smaller printers and know you need the volume
- Maximum speed (600mm/s) genuinely benefits your workflow
My Personal Take
If I were spending my own money today, I’d choose the Ender 3 V3 KE without hesitation. That $259 price point (currently $65 off from $324) hits the sweet spot where you’re getting professional-grade features without paying premium prices. The 300°C hotend alone future-proofs your investment—even if you’re only printing PLA today, you’ll appreciate the flexibility when curiosity strikes about stronger materials.
The SE is genuinely excellent for its price, but I’ve seen too many users outgrow its limitations within months and wish they’d started with the KE. That $62 difference seems significant when you’re buying, but it becomes trivial when you’re actually using the printer and encountering the KE’s advantages daily.
The Plus is a specialist tool. If you don’t have specific projects requiring its larger volume, it’s overkill. But for users who do need that space, there’s no substitute—it transforms what’s possible in single-print sessions.
Take Action: Start Your 3D Printing Journey Today
The hardest part about 3D printing is taking that first step. Trust me—once you hold your first successful print in your hands, you’ll wonder why you waited so long. Whether you choose the budget-friendly SE, the versatile KE, or the large-format Plus, you’re getting a reliable machine backed by Creality’s reputation and a massive community of users ready to help.
Remember: every expert 3D printer user was once a complete beginner staring at product pages wondering which model to buy. The difference between them and everyone else? They actually clicked “Add to Cart” and started learning. Make 2025 the year you join the 3D printing community.
Still have questions? Drop them in the comments below, and I’ll personally respond with advice tailored to your situation. Happy printing! 🎨
Disclosure: This article contains affiliate links. If you purchase through our links, we may earn a commission at no additional cost to you. This helps us continue providing detailed, honest reviews and comparisons. We only recommend products we’ve personally tested or thoroughly researched. Your support is appreciated!
Related posts:
 Best 3D Printer Black Friday Deals 2025: What’s Actually Worth Buying (Based on Real Amazon Sales Data)
  Anycubic Kobra S1 Combo vs QIDI PLUS4 3D Printer : Which One Wins for 3D-Printed Decor?
  FLASHFORGE Adventurer 5M Pro vs Anycubic Kobra 3 Combo Review: Which 3D Printer Wins Your 2025 Projects? Click to Find Out!
  Flashforge Adventurer 5M vs Creality K1
  Creality K1 SE vs Flashforge Adventurer 5M: Budget-Friendly 3D Printer Showdown
 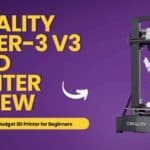 Creality Ender-3 V3 SE 3D Printer Review: The Ultimate Budget 3D Printer for Beginners
  Creality K1 SE 3D Printer: 2025’s Top Budget 3D Printer Reviewed
  11 Best Entry-Level 3D Printers 2025 on Amazon Under $500: Unbiased Review
  Why 87% of Small Businesses Waste Money on Wrong 3D Printers (2025 Buying Guide)
  Creality K2 Plus Combo vs Anycubic Kobra 3 Combo Review: Battle of the Multi-Color 3D Printers
  Top 5 Reasons to Buy the Elegoo Neptune 4 Plus in 2025 (And 2 Reasons Not To)
  Prime Day 3D Printer Deals 2025: Top Picks for Hobbyists and Makers