Ever wonder why your 3D prints sometimes come out looking stringy, brittle, or just plain messy? You’re not alone! One of the biggest culprits behind these frustrating print failures is something you might not even think about: moisture in your 3D printer filament.
Affiliate Disclosure
We participate in Amazon affiliate programs, earning fees from qualifying purchases via links at no extra cost to you. It’s how we keep this blog rolling and my 3D printers buzzing with fresh filament for reviews like this one!
It’s a common problem that can turn an exciting print project into a headache. But don’t worry, we’re here to walk you through everything you need to know to keep your filament in tip-top shape, ensuring smoother prints and better-looking results every time. Think of this as your essential guide to saying goodbye to moisture-related print woes for good!
The Silent Killer: How Moisture Ruins Your 3D Prints
Most 3D printer filaments, especially popular ones like PETG, Nylon, and even PLA, are hygroscopic. That’s a fancy word meaning they love to soak up moisture from the air, much like a sponge. When your filament absorbs water, it becomes a ticking time bomb for your prints.
Here’s what happens when you print with wet filament:
- Weak and Brittle Prints: The absorbed water turns into steam when it hits your printer’s hot nozzle. This steam creates tiny bubbles and voids inside the extruded filament. Imagine trying to build a strong wall with bubbly, weak concrete – your prints end up fragile and prone to breaking.
- Ugly Surface Finishes: Those tiny steam bubbles don’t just weaken the print; they also pop on the surface, leaving behind unsightly bumps, pits, and an overall rough texture. You might even see “blobs” or “zits” where the steam escaped.
- Stringing and Oozing: The steam pressure can push filament out of the nozzle even when it’s not supposed to, leading to annoying wisps of plastic between parts (stringing) or excessive dribbling from the nozzle (oozing).
- Clogging Nightmares: In severe cases, enough steam can build up to cause a partial or complete blockage in your hotend, bringing your print to a grinding halt and potentially damaging your printer.
- Audible Warnings: Sometimes, you can actually hear your filament crying for help! A popping or crackling sound during printing is a sure sign that moisture is boiling off in the nozzle.
Image 1: Wet filament causing stringy and bubbly 3D prints, ruining surface quality. Source: Drywise.
Ultimately, wet filament wastes your precious time and material, and can even shorten the lifespan of your printer’s components. That’s why drying your filament isn’t just a nice-to-have; it’s a must-have for anyone serious about 3D print quality.
Solution 1: Supercharge Your Filament Dryer with a Smart Upgrade
You might already own a filament dryer – great start! Brands like Sunlu, Comgrow, Creality, and Sovol all offer popular options (check out our deep dives into models like the Sunlu Filament Dryer E2 Review, Comgrow SH02 Filament Dryer Box Review, and the Creality Space Pi Plus Filament Dryer Review). While these dryers do a good job of heating and drying, many share a hidden flaw that can still cause issues during printing: their filament exit ports.
The Hidden Problem: Unnecessary Friction
Most filament dryers have a fixed hole or port where your filament exits to go to your 3D printer. The issue? This hole is rarely perfectly aligned with how your filament actually unwinds from the spool.
Think about it:
- As your filament unwinds, it comes off the spool at a tangent (like a string coming off a ball). When the spool is full, the filament comes from the outer edge. When it’s nearly empty, it comes from closer to the center. A fixed exit port can’t adapt to these changes. This often means the filament is forced into a sharp bend right at the exit, creating a lot of friction.
What does this friction do?
- Puts Strain on Your Printer: Your extruder motor has to pull harder to get the filament through that tight bend. This can lead to skipped steps, inconsistent extrusion, and even premature wear on your motor.
- Causes Underextrusion: If the extruder can’t pull filament smoothly, you’ll get less plastic coming out of the nozzle than expected, resulting in weak, gappy prints.
- Increases Filament Breakage: Filament, especially if it’s already a bit brittle from being dried (or from moisture initially), is more likely to snap under this constant stress.
Image 2: A filament dryer with a fixed exit port causing filament to bend sharply, increasing friction. Source: F2P.
The Smart Fix: An Articulating Filament Port
Wouldn’t it be great if the filament exit could just move with the spool, always providing a smooth path? That’s exactly what an articulating filament port does!
Inspired by “rose joints” or spherical bearings used in things like race cars (which allow movement in multiple directions), this clever 3D-printable upgrade lets your PTFE tube (the little white tube that guides filament) swivel freely.
As your spool rotates and the filament unwinds from different positions, the articulating port simply adjusts, keeping the path straight and smooth. This means:
- Massively Reduced Friction: No more sharp bends for your filament!
- Less Strain on Your Printer: Your extruder works effortlessly.
- More Consistent Extrusion: Smoother flow means better print quality.
- Reduced Risk of Filament Breakage: Your filament experiences less stress.
It’s a simple upgrade that makes a huge difference in print reliability.
Video 1: A demonstration of an articulating filament port reducing friction in a filament dryer. Source: Printables.
How to Build Your Own Articulating Port: A Quick DIY Guide
Ready to upgrade? Here’s what you’ll need and how to do it:
The Key Component: A “Pass-Through” PC4-M6 Fitting You’ll need a special pneumatic connector. Look for a PC4-M6 pass-through fitting.
- PC4 means it fits a standard 4mm PTFE tube.
- M6 means it has an M6 threaded end for screwing into things.
- “Pass-through” is the crucial part: most PC4-M6 fittings have a tiny hole that stops the PTFE tube from going all the way through. You need one where the 4mm PTFE tube can slide straight through the entire fitting.
If you can’t find a pass-through version, you can carefully drill out a regular PC4-M6 fitting with a 4mm drill bit. A drill press is best for keeping it straight! You can often find these specialized fittings on sites like AliExpress for very cheap.
Tools You’ll Need:
- A Drill: To enlarge the hole in your dryer.
- Step Drill Bit (Recommended): This handy tool makes enlarging holes easy and clean, reducing the risk of cracking your dryer’s lid.
- 13mm or 1/2 inch Drill Bit: To get the final hole size for the printed part.
- Small Flathead Screwdriver: For assembly.
- PTFE Tubing: To guide your filament from the dryer to your printer.
3D Print the Articulating Part: You’ll need to 3D print the “ball joint” part of the articulating port. Many designs are available on sites like Printables, often with customizable options.
- Filament Choice: Since your dryer gets warm, use a heat-resistant filament like PETG, ASA, or Nylon. PLA isn’t ideal here as it can soften.
- Print Settings: For the best results, use a finer layer height (for smoother threads) and ensure strong walls (more “perimeters” or “wall loops” in your slicer settings). You likely won’t need supports, but a small brim might help the base stick to the print bed.
Installation Steps:
- Remove Old Port: Take off the old filament exit port from your dryer.
- Enlarge Hole: Using your step drill or 13mm/1/2 inch drill bit, carefully make the hole in your dryer’s lid bigger. Clean away any plastic shavings.
- Assemble the Printed Part: Screw the printed nut onto the main body. Then, carefully screw your pass-through PC4-M6 fitting into the printed part. Use a flathead screwdriver in the little notch inside the printed part to hold it steady while you tighten the fitting.
- Insert PTFE Tube: Push your PTFE tube through the fitting so it comes out a little on the inside of the dryer.
- Install in Dryer: Remove the printed nut. Feed the assembled articulating part through the enlarged hole in your dryer lid. Screw the printed nut back on from the other side to secure it firmly.
- Test and Adjust: Feed a piece of filament through. Wiggle the joint to break it loose, then let it settle into a position where the filament pulls through with the least resistance.
That’s it! You’ve just given your filament dryer a serious upgrade. If you’re looking for more advanced options, check out reviews of dryers like the Creality Space Pi X4 Filament Dryer or the Sunlu FilaDryer S4. We even have a comparison of the Sunlu FilaDryer S4 vs. Polymaker PolyDryer to help you choose the best filament drying solutions for 3D printing.
Solution 2: The DIY Dry Box – Your Filament’s Long-Term Home
Even with a top-notch filament dryer, you need a good place to store your filament when it’s not actively being used or dried. That’s where a DIY dry box comes in. It’s super easy to make, very effective, and won’t break the bank.
What You’ll Need:
- Waterproof Storage Container: This is your main component. Look for plastic containers with a rubber gasket around the lid. This gasket is key to creating an airtight seal. Pick a size that fits the number of spools you typically store.
- Silica Gel Desiccant: This is the moisture-absorbing magic. Color-indicating silica gel (which changes color when it’s saturated with moisture) is a popular choice. For a container holding about 5 spools, around a pound of silica gel is a good starting point.
- Mesh Bags: Don’t skip these! Mesh bags for your silica gel are a lifesaver. Instead of pouring loose silica beads into your container (which makes cleanup and regeneration a huge mess), simply fill these bags.
- ThermPro Humidity Gauge: While color-indicating silica gel is okay, a digital humidity gauge (like a ThermPro) gives you precise readings. You want to keep the humidity inside your box in the low 20s (percentage).
- Dedicated Food Dehydrator: This is our top recommendation for regenerating your silica gel. Please, please, please avoid using your kitchen oven or microwave for this. Silica gel can gas off and become sticky, potentially contaminating surfaces you use for food. A small, inexpensive food dehydrator dedicated to filament storage is a smart investment.
Image 3: A DIY dry box with silica gel bags and a humidity gauge for storing 3D printing filament. Source: Magigoo.
How to Build Your DIY Dry Box:
- Print a Gauge Holder (Optional): If you like things tidy, you can 3D print a simple bracket to hold your humidity gauge securely inside the box. Use some double-sided tape to stick it to the inside wall, keeping it low and out of the way of your spools. Check out cool things to 3D print for inspiration.
- Fill Mesh Bags: Pour your silica gel into the mesh bags. You can divide it evenly among a few bags.
- Place and Load: Drop the filled mesh bags into the corners of your airtight container. Then, load your filament spools inside.
- Seal It Up: Close the lid firmly, making sure that gasket creates a perfect seal.
Keeping Your Dry Box Dry: Regenerating the Silica Gel
Your humidity gauge is your best friend here. When you see the humidity level inside your dry box start to climb above 30-35%, it’s time to “recharge” your silica gel.
- Load the Dehydrator: Take your mesh bags of silica gel out of the dry box. Place them in your dedicated food dehydrator. Spread them out a bit to allow for good airflow between the bags.
- Set the Temperature: Most silica gel regenerates well at around 120–150°C (250–300°F). Check your dehydrator’s manual for the exact settings. Run it for 2–3 hours until the silica gel returns to its original color (if using color-indicating gel) or the humidity gauge shows low moisture levels when placed back in the box.
- Reload and Monitor: Place the regenerated silica gel bags back in the dry box, seal it up, and check the humidity gauge after a few hours to ensure it’s back in the low 20s.
Video 2: A step-by-step guide to setting up a DIY dry box for filament storage. Source: F2P.
This DIY dry box is a game-changer for filament storage, keeping your 3D printing filament safe from moisture between prints. For more tips on maintaining your setup, see our ultimate guide to 3D printer maintenance.
Solution 3: Choosing the Best Professional Filament Dryer
If you’re ready to invest in a professional filament dryer, you’ll want one that matches your needs and workflow. Not all dryers are created equal, so here are key factors to consider and some top picks to explore.
Key Factors to Consider
- Material Compatibility: Ensure the dryer supports your filament types (e.g., PLA, PETG, Nylon, or advanced materials like PEEK). Check out our filament compatibility guide for details.
- Spool Capacity: Do you need to dry one spool or multiple? Some dryers, like the Sunlu FilaDryer S4, handle up to four spools.
- Drying Method: Active dryers (using heat and air circulation) are faster and more effective than passive ones (using desiccants alone). Most professional dryers combine both for optimal results.
- Direct Feeding: Inline dryers feed filament directly to your printer, saving time and reducing re-absorption risks.
- Extra Features: Look for smart features like humidity sensors, touchscreen controls, or WiFi connectivity for remote monitoring.
Top Professional Filament Dryers
Here’s a rundown of some top filament drying solutions to consider, based on our detailed reviews:
- Sunlu FilaDryer S2
- Best for: Hobbyists and small-scale printing.
- Features: Supports PLA, ABS, PETG, and hygroscopic materials like Nylon. Accommodates one 1kg spool (Ø210 x 85 mm). Max temperature of 70°C with a 4.6-inch LCD touchscreen.
- Why We Like It: Affordable, user-friendly, and supports direct feeding.
- Learn More: Sunlu Filament Dryer E2 Review.
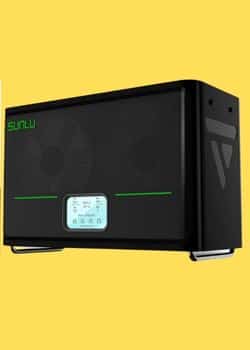
- Sunlu FilaDryer S4
- Best for: Multi-spool printing or print farms.
- Features: Holds up to four 1kg spools, with a powerful 330W PTC heating element and triple-fan setup. Features automatic humidity control and heat-resistant PTFE tubing.
- Why We Like It: High capacity and fast drying for demanding workflows.
- Learn More: Sunlu FilaDryer S4 vs. Polymaker PolyDryer.
- Creality Space Pi Plus
- Best for: Creality printer users seeking seamless integration.
- Features: Supports a wide range of filaments, with a max temperature of 70°C and inline drying capabilities. Compact design with smart sensors.
- Why We Like It: Reliable and tailored for Creality ecosystems.
- Learn More: Creality Space Pi Plus Filament Dryer Review.
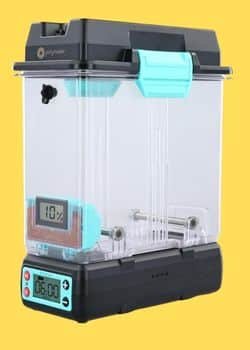
- Polymaker PolyDryer
- Best for: Advanced materials like Nylon and PEEK.
- Features: Active and passive drying with precise temperature control. Compact and efficient for professional setups.
- Why We Like It: Ideal for engineering-grade filaments.
- Learn More: Polymaker PolyDryer Review.
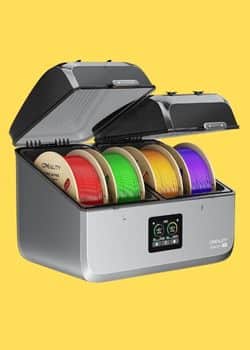
Image 4: A lineup of professional filament dryers, including Sunlu and Creality models. Source: F2P.
For a full comparison, see our article on The Best Filament Dryers for 3D Printing: Top 10 Picks.
Comparison Table: Top 3D Printer Filament Dryers
Here’s a handy table to help you choose the best filament dryer for your needs:
Filament Dryer Comparison
| Filament Dryer | Capacity | Diameters | Drying Temps (°C) | Drying Method | Humidity Sensor | Direct Feeding | Materials | User Experience | Buy Now |
|---|---|---|---|---|---|---|---|---|---|
 Sunlu FilaDryer S2 Sunlu FilaDryer S2 | 1 spool x 1kg (Ø210×85 mm) | 1.75, 2.85, 3.00 mm | 35–70 | Active (heat) | Yes | Yes | PLA, ABS, PETG, TPU, Nylon | 4.6″ LCD touchscreen | Buy Now ($359.99) |
 Sunlu FilaDryer S4 Sunlu FilaDryer S4 | 4 spools x 1kg (Ø210×85 mm) | 1.75, 2.85, 3.00 mm | 35–70 | Active + passive (heat + desiccant) | Yes | Yes | PLA, ABS, PETG, TPU, Nylon, ASA, HIPS | LCD touchscreen | Buy Now ($139.99) |
 Creality Space Pi Plus Creality Space Pi Plus | 2 spools x 1kg | 1.75, 2.85 mm | 45–70 | Active + passive | Yes | Yes | PLA, ABS, PETG, Nylon | LCD touchscreen, real-time monitoring | Buy Now ($65.99) |
 Polymaker PolyDryer Polymaker PolyDryer | 1 spool x 1kg | 1.75, 2.85 mm | Up to 60 (preset) | Active + passive | Yes | Yes | PLA, ABS, PETG, Nylon, PEEK | Modular design, color-changing desiccant | Buy Now ($74.79) |
 Comgrow Filament Dryer Comgrow Filament Dryer | 2 spools x 1kg | 1.75, 2.85 mm | 40–50 | Active | Yes | Yes | PLA, ABS, PETG | LCD display, sealed design | Buy Now ($41.99) |
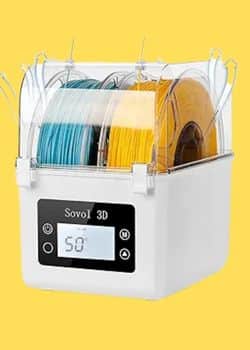 Sovol SH01 Sovol SH01 | 2 spools x 1kg | 1.75, 2.85 mm | 40–50 | Active | Yes | Yes | PLA, ABS, PETG | Real-time monitoring, silicone seal | Buy Now ($41.99) |
 EIBOS Polyphemus EIBOS Polyphemus | 3 spools x 1kg (with extension) | 1.75, 2.85 mm | 20–70 | Active + passive | Yes | Yes | PLA, ABS, PETG, Nylon | Auto-rotation, humidity control | Buy Now ($127.99) |
 THETA NanoHex THETA NanoHex | 1 spool x 1kg | 1.75 mm | Adaptive | Active | Yes | Yes | PLA, ABS, PETG | One-button, AI humidity control | Buy Now ($29.00) |
 Kingroon Filament Dryer Kingroon Filament Dryer | 1 spool x 1kg | 1.75, 2.85 mm | 50–70 | Active | Yes | Yes | PLA, ABS, PETG | Built-in fan, auto-standby | Buy Now ($21.99) |
 Creality Space Pi X4 Creality Space Pi X4 | 4 spools x 1kg | 1.75, 2.85 mm | Up to 85 | Active + passive | Yes | Yes | PLA, ABS, PETG, Nylon | Dual chambers, <40dB, dehumidification | Buy Now ($159.00) |
Table 1: A comparison of top filament dryers for 3D printing. Source: 3DPrintedDecor.
Choosing the Perfect Filament Dryer
Whether you’re a hobbyist printing PLA decorations or a professional working with advanced materials, keeping your 3D printing filament dry is crucial for 3D print quality. Here’s a quick recap to help you decide:
- Upgrade Your Existing Dryer: Add an articulating filament port to reduce friction and improve print consistency. It’s a cheap, DIY solution that works with most dryers.
- Build a DIY Dry Box: Store your filament in an airtight container with silica gel to prevent moisture re-absorption. It’s affordable and effective for long-term filament storage.
- Invest in a Professional Dryer: Choose a model like the Sunlu FilaDryer S4 or Creality Space Pi Plus for reliable, high-performance drying. Check our filament dryer reviews for more options.
For more 3D printing tips, explore our guides on choosing the best 3D printer or top filaments for 3D printing. Say goodbye to failed prints and hello to flawless results with dry filament!
Related posts:
 Why Risk Poor Prints? SUNLU FilaDryer S4 Guarantees Dry, Ready-to-Use Filament!
  Comgrow Filament Dryer Box Review: Is This the Best Budget Dryer for 3D Enthusiasts?
  Creality Space Pi Plus Filament Dryer vs Comgrow Filament Dryer Box: Which One Boosts Your 3D Prints Best?
  SUNLU FilaDryer SP2: 2-in-1 Dryer Drops May 19!
  Sovol SH01 Filament Dryer 2025 Review: Best Budget Pick for 3D Printing?
  The Best Filament Dryers for 3D Printing: Top 10 Picks
  Creality Space Pi Plus Filament Dryer Review: Say Goodbye to Moisture Issues
  Creality Official Filament Dryer Box 2.0 Review
  Polymaker PolyDryer Review: Top Filament Dryer to Buy in 2025
  Kingroon Filament Dryer Box 2025 Review: Top Features, Pros, Cons & Where to Buy
  Sunlu Filadryer S4 vs Polymaker PolyDryer: Which Filament Dryer Perfects Your Decor Prints in 2025?
  SUNLU Filament Dryer E2 Review: A Reliable Tool for 3D Printing