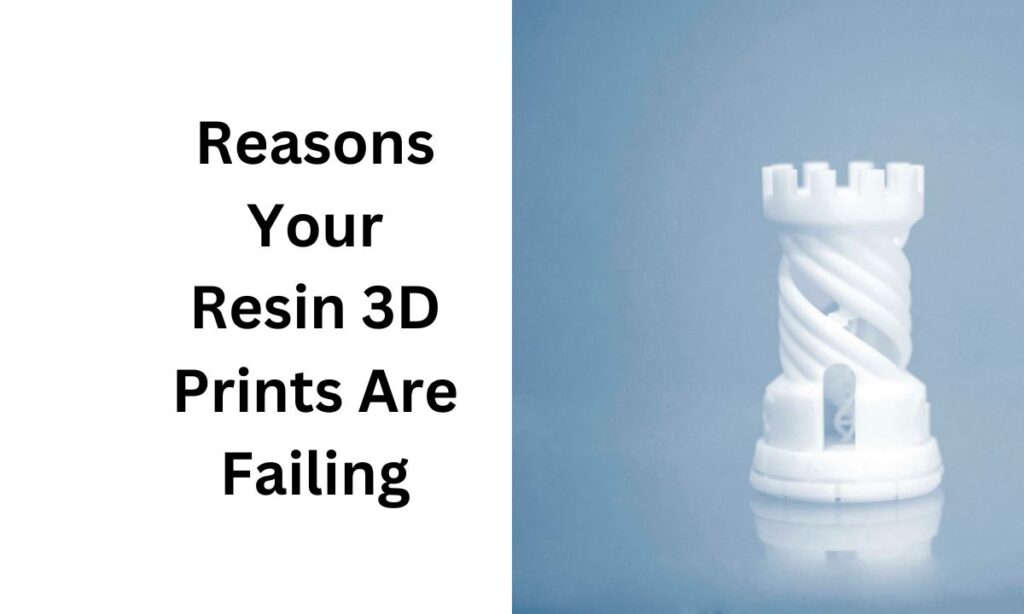
Resin 3D printing rewards persistence—fix leveling, settings, or maintenance issues with advanced tips to turn failures into stunning prints.
Spending hours designing the perfect 3D model, carefully setting up your resin printer, and eagerly pressing print, only to find… nothing. Your build plate is empty, and frustration sets in. Don’t worry – you’re not alone. Failed prints are a common frustration among resin 3D printer users, but the good news is that most issues can be resolved with some troubleshooting and expert advice.
Affiliate Disclosure
We participate in Amazon affiliate programs, earning fees from qualifying purchases via links at no extra cost to you. It’s how we keep this blog rolling and my 3D printers buzzing with fresh filament for reviews like this one!
In this guide, we’ll dive into not just the usual causes of why resin 3D prints are failing but also the overlooked and uncommon ones. Plus, we’ll share advanced tips, tools, and insights to help you master resin printing.
Related: Ultimate Resin Printer Maintenance Guide – Maintain resin printers for better results.
Is It Normal for Resin Prints to Fail?
Yes, and Every Failure Is a Learning Opportunity
If your prints keep failing, know that it’s a normal part of the learning curve for resin 3D printing. These printers require a fine balance of mechanics, chemistry, and settings to work correctly. With persistence and the right guidance, you can troubleshoot and overcome these challenges to create stunning prints.
Related: Why Is My 3D Prints Resin Mirroring or Prints Coming Out Reversed? – Address specific resin issues.
Common and Overlooked Causes of Why Resin 3D Prints Are Failing
1. Improper Build Plate Leveling
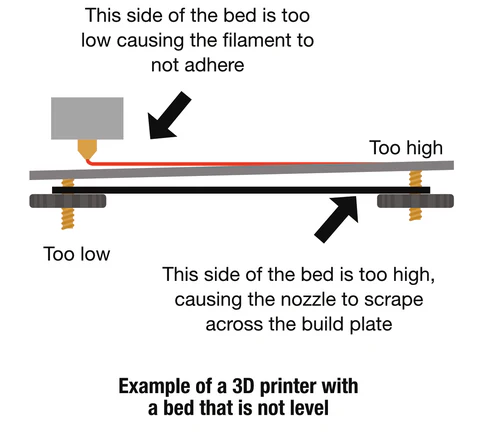
Why This Happens
The build plate level must be perfectly aligned for the resin to adhere and form the base of your print. Even a slight tilt can result in failed prints or no prints at all.
Solution
Manual Leveling: Use a piece of paper between the plate and the vat to ensure proper resistance when tightening screws.
Advanced Tool Hack: Invest in a digital leveling tool for higher accuracy.
Calibration Cube Test: Print a small calibration cube to verify the leveling before starting larger projects.
Practical Tip
Level your build plate after every 3–5 prints or anytime you notice adhesion issues.
2. Resin Not Curing Properly
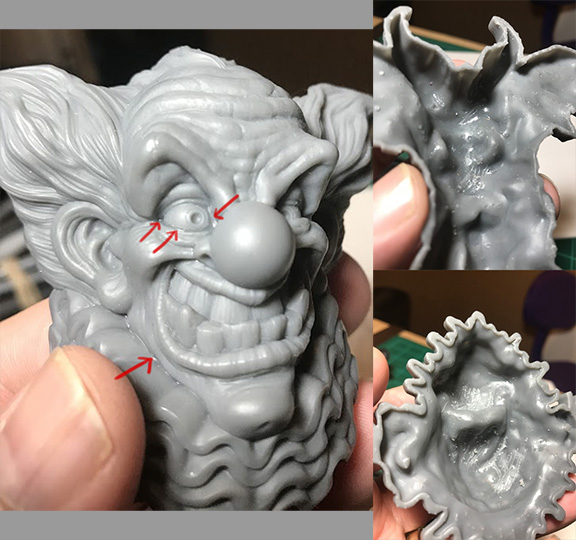
Why This Happens
UV light is responsible for hardening the resin layer by layer. If the light is weak or blocked, curing won’t occur as expected.
Solution
Check UV Light Strength: Perform a UV test or look for uneven curing in previous prints.
Clean the Resin Vat: Residue or cloudy FEP films can block UV light. Use isopropyl alcohol and a lint-free cloth to clean the vat.
Control Resin Temperature: Cold resin doesn’t cure efficiently. Use a small resin heater or keep your printer in a temperature-controlled room (20–25°C).
Hidden Insight
Certain resins cure better with longer exposure times, especially flexible or biocompatible varieties. Check the resin manufacturer’s guidelines.
3. Incorrect Resin or Printer Settings
Why This Happens
Every resin and printer has unique requirements. Using the wrong resin or incorrect settings can result in incomplete or failed prints.
Solution
Double-Check Resin Compatibility: Ensure your resin matches your printer’s wavelength (e.g., 405nm).
Fine-Tune Exposure Settings: Use a resin exposure test model to determine optimal exposure times for your setup.
Store Resin Properly: Keep resin in opaque, sealed containers to avoid degradation.
Pro Tip
Start with the recommended settings in your slicing software but tweak parameters like bottom layer exposure and lift speed based on your printer model.
4. Clogged FEP Film or Dirty Vat
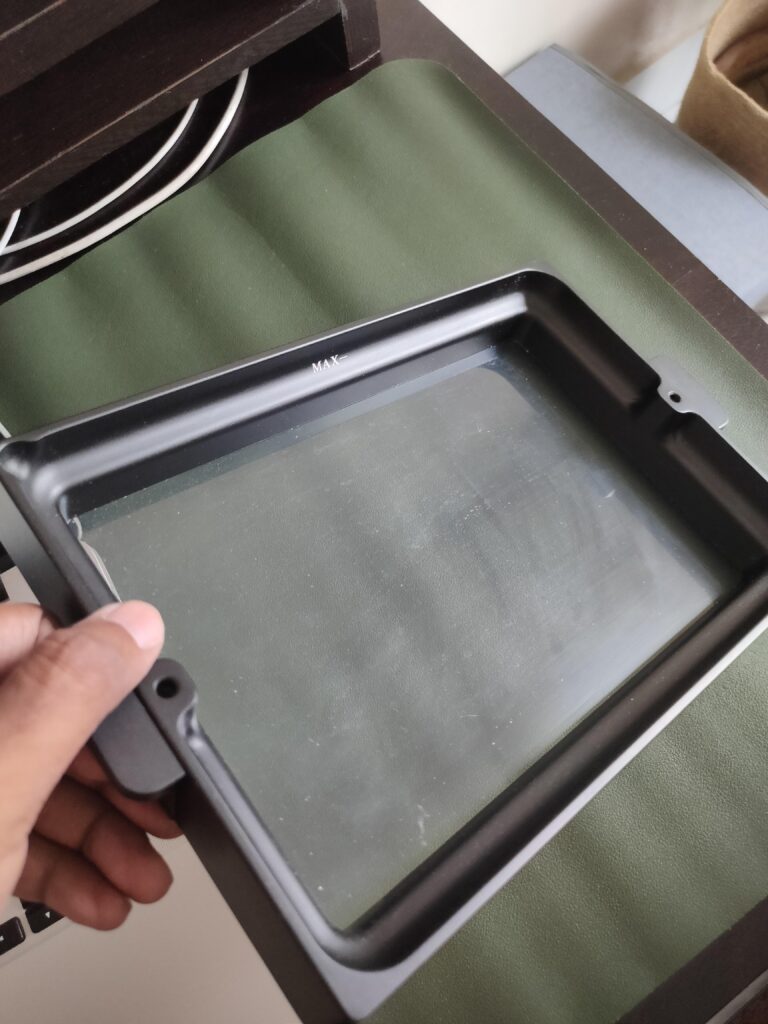
Why This Happens
Debris or cloudiness in the FEP film prevents light from curing the resin uniformly.
Solution
Strain Resin After Each Print: Use a fine mesh filter to remove cured particles.
Inspect the FEP Film: Replace it if it’s scratched, cloudy, or punctured.
Avoid Sharp Tools: Use plastic scrapers to clean the vat without damaging the film.
Hidden Tip
Try adding a thin layer of silicone lubricant to the FEP film to improve resin release and prevent sticking.
5. Firmware or Slicing Errors
Why This Happens
Outdated firmware or slicing issues can confuse your printer, leading to errors during the print process.
Solution
Update Firmware Regularly: Check the manufacturer’s website for updates and install them.
Re-Slice Your Model: Corrupted or improperly sliced files are common culprits.
Test Known Files: Use a simple test file from a trusted source to rule out slicing errors.
Pro Tip
Stick to well-known slicing software like Lychee or Chitubox, as they’re frequently updated to support new printers and features.
Advanced Tips and Insights
Environmental Factors: Humidity can cause resin to behave inconsistently. Use a dehumidifier in your printing area.
Uncommon Printer Issues: If nothing seems to work, inspect components like the LCD screen for dead pixels or the stepper motor for wear.
Community Support: Join online forums and communities like Reddit’s r/resinprinting to learn from others’ experiences and get advice.
Related: Best Resin 3D Printers for Miniatures in 2025 – Upgrade to reliable resin printers.
Empathy and Encouragement
We understand how frustrating failed prints can be. When you’ve poured time, energy, and money into a project, it’s disheartening to see it fail. Remember, every print failure teaches you something new about your printer and your process. With patience and persistence, you’ll get better at identifying and fixing issues, and eventually, you’ll enjoy the satisfaction of perfect prints.
Bonus: 3D Printer Maintenance Checklist

Clean the resin vat and FEP film after every print.
Regularly check and tighten build plate screws.
Update firmware every 2–3 months.
Store resin in a dark, cool place.
Test your printer settings monthly using a calibration print.
Related: 3D Printing Safety Gear Must-Haves – Stay safe while resin printing.
Frequently Asked Questions (FAQs)
Why is my resin not sticking to the build plate?
This is likely due to improper leveling or insufficient bottom layer exposure. Re-level the build plate and increase the exposure time for the bottom layers.
How can I tell if my UV light is failing?
Perform a UV test or look for uneven curing patterns in previous prints. Dim or discolored light can indicate a problem.
Can environmental factors affect prints?
Yes, temperature and humidity can significantly impact resin performance. Keep your printer in a controlled environment between 20–25°C with low humidity.
Is expired resin usable?
Using expired resin may lead to inconsistent curing or print failures. Check the expiration date and store resin properly to maximize its lifespan.
What is the best way to avoid failed prints?
Follow regular maintenance routines, double-check your setup before printing, and always test new resins or settings with a small calibration file.
Conclusion
Resin 3D printing can be a challenging but rewarding process. When prints fail, it’s often due to small, fixable issues like leveling errors, improper settings, or maintenance oversights. By following the advice in this guide—especially the advanced tips—you can resolve these problems and improve your success rate. Remember, patience and persistence are key. With each failure, you’re gaining the knowledge and skills to create stunning 3D prints. Happy printing!
Related posts:
 Why Is My 3D Print’s Resin Mirroring or Prints Coming Out Reversed?
  How Far Should a 3D Printer Nozzle Be from the Bed?
  Customization at its Best: Designing Your Own 3D Printed Decor
  Top 20 Profitable 3D Printed Products to Sell
  Can I Become a Billionaire from 3D Printing?
  Unbeatable Black Friday Deals on the Best 3D Printers of 2024
  Creality Space Pi Plus Filament Dryer Review: Say Goodbye to Moisture Issues
  Anycubic Kobra 3 Review: Is This the Best 3D Printer of the Year?
  The Ultimate Guide to Advanced 3D Printing Filaments: Unlocking Properties, Real-World Uses, and Pro Secrets
  Original Prusa MK4S 3D Printer Review: Your 2025 Guide to DIY Decor Bliss
  Creality CR-Ferret SE 3D Scanner Review: Your Budget-Friendly 3D Scanning Solution
  Bambu Lab A1 Mini vs Creality Ender 3 V3 SE: Which Should You Pick?