
DIY 3D printed decor lets you craft unique pieces, from coasters to vases, tailored to your style. Embrace the process, try new techniques, and bring your ideas to life with your 3D printer!
Imagine transforming your home with custom decor pieces made entirely by you. With DIY 3D printed decor, you can bring your ideas to life and create unique items that reflect your style. When I first began experimenting with 3D printing, I quickly realized its potential to make everything from one-of-a-kind planters to intricate wall art. Whether you’re a novice or an experienced DIYer, this guide will walk you through the basics of creating stunning decor with a 3D printer — from setup to finishing touches. Let’s dive into the world of DIY 3D printed decor and explore how you can get started with ease.
Chapter 1: Understanding the Basics of DIY 3D Printed Decor
What is 3D Printing?
Affiliate Disclosure
We participate in Amazon affiliate programs, earning fees from qualifying purchases via links at no extra cost to you. It’s how we keep this blog rolling and my 3D printers buzzing with fresh filament for reviews like this one!
At its core, 3D printing is a way to create three-dimensional objects by building them layer by layer, directly from a digital file. This method, also called additive manufacturing, enables the creation of complex shapes and designs perfect for home decor projects.
Types of 3D Printers for Home Decor
For making DIY 3D printed decor, two types of printers are especially popular:
- FDM (Fused Deposition Modeling): Ideal for home use, FDM printers are budget-friendly, easy to use, and work by layering melted plastic filament.
- SLA (Stereolithography): SLA printers use resin and UV light to create highly detailed models. These printers are pricier but excellent for decor pieces requiring smooth, intricate details.
Essential Tools and Materials
To get started with DIY 3D printed decor, gather these essentials:
- Filament: PLA is an affordable, eco-friendly filament great for beginners.
- Build Surface: A heated build plate ensures prints stick properly.
- 3D Modeling Software: Tinkercad, Fusion 360, or Blender allow you to design and customize decor pieces.
- Post-Processing Supplies: Items like sandpaper, paint, and sealant can enhance your finished decor.
Chapter 2: Setting Up Your 3D Printer for DIY Decor Projects
Setting up your 3D printer correctly is key to achieving high-quality results for DIY 3D printed decor.
Step-by-Step Setup
- Assemble and Calibrate: Many 3D printers come partially assembled, so follow the instructions carefully.
- Level the Build Plate: Proper leveling is essential to prevent warping and ensure layers adhere well.
- Load Filament: Insert the filament into the extruder, following the manufacturer’s guide.
Tips for a Smooth Start
- Begin with a Test Print: Simple test files help verify that your settings are correct.
- Adjust the Temperature: Filament types have specific temperature ranges. For PLA, set the temperature around 200°C.
Avoiding Common Pitfalls
- Poor Plate Adhesion: If your prints don’t stick, try using adhesive solutions or leveling the plate again.
- Filament Jams: Regularly maintain the extruder and nozzle to prevent clogging.
Chapter 3: Designing DIY 3D Printed Decor
Creating your own designs is one of the most rewarding parts of DIY 3D printed decor. With a few tools, you can easily design your own pieces.
Beginner-Friendly 3D Modeling Software
- Tinkercad: This user-friendly, browser-based software is perfect for new users.
- Blender: Free and versatile, Blender is great for creating detailed and artistic designs.
- Fusion 360: Known for its precision, Fusion 360 is ideal for more complex decor items.
Step-by-Step Guide to Creating Simple Decor
For a quick project, try designing a coaster in Tinkercad:
- Start a New Project: Open Tinkercad and choose a simple shape.
- Adjust Dimensions: Resize the shape to the desired size for your coaster.
- Add Details: Add textures, patterns, or even a monogram.
- Export the File: Once ready, export your design as an STL file for slicing.
Resources for Design Files
- Thingiverse: A free resource filled with thousands of 3D printable decor designs.
- MyMiniFactory: Offers both free and premium designs, perfect for DIY projects.
Chapter 4: Printing Your DIY 3D Printed Decor Designs
With your design file ready, the next step is preparing it for printing.
Slicing and Print Preparation
Slicing involves converting your design file into layers that your printer can understand.
- Use a Slicer Program: Programs like Cura or PrusaSlicer create the instructions for your 3D printer.
- Select Print Settings: Important settings include layer height, infill percentage, and support structures.
Choosing the Right Settings
- Layer Height: Lower heights (e.g., 0.1mm) result in smoother prints but take longer.
- Infill Percentage: High infill makes items stronger, which is useful for functional decor items like hooks or shelves.
Troubleshooting Common Issues
When printing DIY 3D printed decor, you may encounter some challenges:
- Warping: Adjust the build plate temperature or apply adhesive if warping occurs.
- Stringing: If filament strands are visible, try lowering the print temperature or adjusting retraction settings.
Chapter 5: Adding the Perfect Finishing Touches
Once printed, you can enhance your decor pieces with finishing touches that add a professional look.
Post-Processing Techniques
- Sanding: Sand down any rough edges to create a smooth surface.
- Painting: Acrylic paints work well on PLA. Add a primer coat for more vibrant colors.
- Sealing: Apply a clear sealant to protect decor items exposed to the elements, like plant pots or outdoor decorations.
Creative Ideas for Finishing
- Metallic Paints: Add gold or silver accents to create a chic, metallic finish on frames or vases.
- Aged Patina: Achieve a vintage look with patina or antique-style paints.
Chapter 6: Inspiring DIY 3D Printed Decor Projects
Looking for ideas? Here are some beginner-friendly DIY 3D printed decor projects to get you started:
- Planters and Vases: Custom shapes and textures make unique plant holders.
- Wall Art: Design abstract or geometric wall panels to enhance your space.
- Organizers: Create trays, jewelry holders, and stands that combine beauty and function.
Customization Tips
- Personalized Monograms: Add initials to create custom decor items.
- Mix Colors and Patterns: Use multiple colors or print patterns for a unique effect.
Conclusion
DIY 3D printed decor is a fantastic way to bring your creativity into your home. From simple coasters to intricate vases, 3D printing allows you to craft custom decor that perfectly suits your style. Embrace the learning process, explore new techniques, and remember that every piece you create is a step toward mastering this exciting technology. So fire up your printer, dive into a project, and watch your decor ideas come to life with DIY 3D printing!
Additional Resources
Imagine designing and creating custom home dAdditional Resources
Here are a few great resources to deepen your knowledge:
- Websites: Reddit’s r/3Dprinting provide advice and inspiration.
- Books: 3D Printing for Dummies and Functional Design for 3D Printing are fantastic guides.
- Tutorials: YouTube channels like Maker’s Muse and 3D Printing Nerd offer helpful video tutorials.
With the right tools, resources, and a bit of imagination, 3D printing lets you craft decor that’s as one-of-a-kind as you are. Enjoy the journey!
Frequently Asked Questions (FAQs)
u003cstrongu003eWhat materials are best for DIY 3D printed decor?u003c/strongu003e
PLA filament is popular for decor due to its ease of use and eco-friendliness, though resin can offer higher detail for intricate designs.
Do I need design experience to create DIY 3D printed decor?
No! Beginners can use free, user-friendly software like Tinkercad or download ready-made designs from sites like Thingiverse.
What types of items can I make for home decor?
You can create planters, wall art, coasters, organizers, vases, and much more. 3D printing allows for endless customization options.
How can I make my 3D printed decor look professional?
Sanding, painting, and sealing can add a polished finish, and experimenting with metallic or patina effects can enhance the look.
Is 3D printing decor cost-effective?
Yes! After the initial printer and material costs, 3D printing is an affordable way to create unique, custom decor pieces at home.
Related posts:
 Customization at its Best: Designing Your Own 3D Printed Decor
  99% of People Think What Glue to Use for 3D Prints: The Ultimate Guide
  Top 5 Filaments for 3D Printing: PLA, TPU, PETG, ABS, ASA Explained
 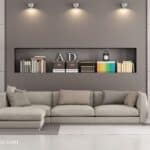 How to Choose the Right 3D Printed Decor for Your Home Style
 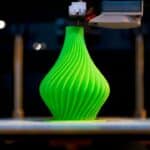 Waterproof Your 3D Printed Vases: A Step-by-Step Guide
  How to Build Your Own 3D Printed Dragon: DIY Enthusiasts
  3D Printing Tips: The Ultimate Janky Yet Effective Beginner’s Guide
  Best 3D Printing Sites for Every 3D Printer User in 2025: Free STL Files, Premium Designs, and More
  FLASHFORGE Adventurer 5M Pro vs Anycubic Kobra 3 Combo Review: Which 3D Printer Wins Your 2025 Projects? Click to Find Out!
  Sovol SV08 Core-XY 3D Printer: The Ultimate Large-Format Solution for Stunning Home Decor
  Best Silk PLA Filaments for Cosplay and Decorative 3D Printing
  8 Top 3D Printer Picks for Beginners in 2025: Budget, Mid-Range, and Premium Options