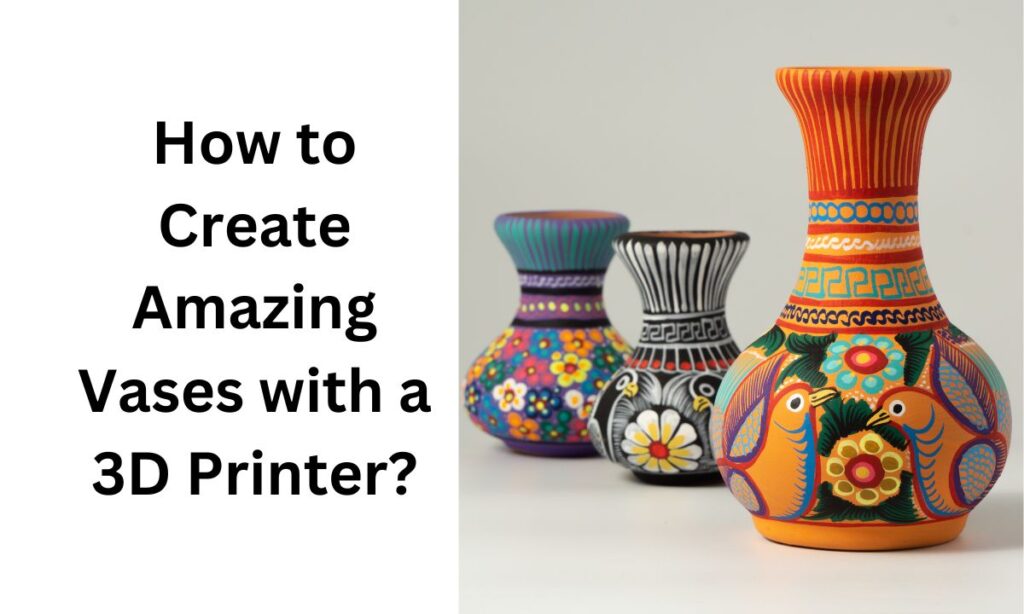
3D printing lets you craft unique vases, from elegant to bold designs. With creativity and experimentation, your printer becomes a powerful tool for stunning, personalized home décor.
Are you tired of the same old vases cluttering your shelves? Do you want to add a personal touch to your home decor without breaking the bank? If so, 3D printing might just be the solution you’ve been looking for! Many people think that creating their own decor items is too complicated or requires advanced skills. However, designing and printing your own vases can be an enjoyable and rewarding experience, even for beginners.
Affiliate Disclosure
We participate in Amazon affiliate programs, earning fees from qualifying purchases via links at no extra cost to you. It’s how we keep this blog rolling and my 3D printers buzzing with fresh filament for reviews like this one!
Imagine being able to create unique vases that perfectly match your style and home aesthetics. Sounds enticing, right? But you may be wondering, “Can I really do this? What if I mess it up?” Let’s explore how you can create stunning 3D printed vases and address any concerns you might have along the way.
Can I Really Create My Own 3D Printed Vases?
You might be asking yourself if designing and printing your own vases is feasible. This is a common concern among those new to 3D printing. The good news is that with the right tools and guidance, anyone can create beautiful vases that are not only functional but also artistic.
Your Concerns Are Valid but Unfounded
It’s completely normal to feel apprehensive about starting a new project, especially one that involves technology like 3D printing. Many people worry about the complexity of design software or the capabilities of their printer. However, these concerns are often based on misconceptions. With user-friendly design software available and numerous online resources, you can easily learn to create stunning designs.
Understanding 3D Printing Basics
At its core, 3D printing is an additive manufacturing process that builds objects layer by layer from a digital model. This means that instead of cutting away material (as in traditional manufacturing), 3D printing adds material where it’s needed. This approach minimizes waste and allows for intricate designs that would be challenging to achieve through conventional methods.
Most commonly used materials in 3D printing include PLA (polylactic acid) and PETG (polyethylene terephthalate glycol). These materials are not only durable but also environmentally friendly options for creating decor items.
Steps to Create Amazing Vases with a 3D Printer?
1. Understanding the Basics of Vase Mode
When it comes to 3D printing vases, one of the most important things to understand is vase mode. Also called spiralize outer contour in some slicer programs, this setting is specifically designed for printing hollow objects with thin walls, like vases. So why is it important? Well, vase mode allows the printer to print a continuous, spiral-like layer, which results in a smooth and seamless surface. Without this setting, you could end up with visible gaps between layers, which aren’t ideal for a vase’s aesthetics or functionality.
Using vase mode also speeds up your print and saves filament, which is a big bonus if you’re working with intricate or large designs. However, it’s worth noting that this mode isn’t ideal for vases that need to hold a lot of weight or water, since it’s designed for single-layered walls.
Tip: Always activate vase mode when printing decorative vases with thin walls to achieve that smooth, uninterrupted finish.
2. Choosing the Right 3D Printer for Vase Printing
Not all 3D printers are created equal, especially when you’re looking to print larger vases. One of the most important features to consider is the build volume—the maximum size of the object your printer can handle. If you want to print tall or wide vases, make sure your printer’s build area is large enough.
There are two common types of 3D printers used for vase printing: FDM (Fused Deposition Modeling) and SLA (Stereolithography). FDM printers are the most popular and affordable option for vase printing, and they work well with a variety of materials. SLA printers are more expensive but offer higher precision and are great for more detailed, delicate designs.
Some popular 3D printers known for handling vase printing well include the Creality Ender 3, which is affordable and has a decent build volume, and the Prusa i3 MK3S, known for its reliability and high-quality prints.
Pro Tip: If you’re aiming for large or complex vases, a printer with a heated bed and good layer adhesion is essential for avoiding warping during long prints.
3. Finding the Perfect Design: Where to Get STL Files for Vases
Once your printer is ready, it’s time to find the perfect vase design. Luckily, there are tons of STL files available online, making it easy to find the exact style you’re looking for. Websites like Thingiverse, MyMiniFactory, and Cults3D offer a wide range of free and paid designs. Whether you want a simple geometric vase or an elaborate, artistic one, you’re bound to find something that catches your eye.
For those who like to add a personal touch, you can use design software like Tinkercad (great for beginners) or Fusion 360 (more advanced) to customize an existing design or create a completely new one from scratch.
Extra Tip: Many vase designs are easily modifiable, so don’t be afraid to experiment with scale, shape, or even adding extra details to the existing file. This is where the real creativity comes in!
4. Picking the Right Material: Filament Options for 3D Printed Vases
The filament you choose plays a crucial role in how your vase looks and performs. For most vase printing, PLA is the go-to filament because it’s easy to use and provides a nice, smooth finish. It’s available in a wide variety of colors and even comes in special finishes like silk PLA, which gives your vases a shiny, almost metallic look.
If you’re planning to use your vase to hold water or plants, PETG is a better option because it’s more durable and water-resistant. It’s also slightly more flexible, which reduces the chances of cracking. On the other hand, if you want something more decorative, you could try wood filament, which gives your vase a unique, natural texture.
Fun Idea: Experiment with multicolor filaments or even glow-in-the-dark PLA to make your vase truly stand out.
5. Mastering the Settings: 3D Printing Tips for Perfect Vases
Getting your printer settings right can make or break your vase printing experience. Let’s go over the most important settings:
- Layer height: For a smoother surface, set a small layer height (0.1mm or 0.2mm). This reduces the visibility of each layer and gives your vase a more polished look.
- Print speed: A slower print speed (around 30-50mm/s) ensures better layer adhesion, which is critical for thin-walled objects like vases.
- Infill: When printing in vase mode, set your infill to 0%. Since the vase walls are printed as a single spiral, no infill is necessary.
- Wall thickness: Set it to a single perimeter (usually 0.4mm or 0.8mm depending on your nozzle size) for best results in vase mode.
Remember, bed leveling and proper nozzle calibration are essential for avoiding issues like layer shifts or gaps. It’s also worth keeping an eye on your first few layers to make sure they’re adhering properly to the bed.
Troubleshooting Tip: If you notice leaks or uneven surfaces, double-check your bed leveling and make sure your filament is feeding smoothly.
6. Post-Processing Your Vase for a Professional Look
Once your vase is printed, it’s time to add those finishing touches that take it from good to great. Sanding the surface can help smooth out any minor imperfections, especially if you used a coarser layer height. After sanding, you might want to polish the vase using a finishing compound to give it a sleek, glossy look.
For those who want to give their vase a more customized appearance, consider painting it. Spray paint works well for plastic surfaces, and you can even add details by hand with acrylics. If you used wood filament, you can stain the vase for a more natural, earthy tone.
Pro Tip: If you plan to use the vase for real flowers or plants, it’s a good idea to apply a waterproofing layer (like a resin coat) to the inside of the vase to prevent leaks.
7. Showcasing Your 3D Printed Vases
Now that your masterpiece is complete, it’s time to show it off! Vases are versatile décor pieces, so consider using them as centerpieces, mantel accents, or even wall-mounted displays. You can also experiment with different colors, shapes, and sizes to create a striking arrangement.
If you’re into home décor trends, you might notice that geometric vases and minimalist designs are particularly popular right now. Combining these with bold colors or metallic finishes can give your space a modern, chic look.
Bonus Idea: 3D printed vases also make thoughtful, personalized gifts. You can design a vase that matches someone’s style perfectly, making it a meaningful addition to their home.
Conclusion
3D printing gives you the freedom to create vases that are entirely your own, from the design and material to the finishing touches. Whether you’re looking to create simple, elegant vases or bold, artistic statement pieces, the possibilities are endless. With a little experimentation and creativity, you can transform a basic 3D printer into a tool for producing stunning home décor.
So, don’t just settle for any vase—create something that’s uniquely yours! Happy printing!
Frequently Asked Questions (FAQs)
Can I 3D print a vase that holds water?
Yes, you can 3D print a vase that holds water, but you need to use the right materials, like u003cstrongu003ePETGu003c/strongu003e, which is more water-resistant than standard PLA. Additionally, applying a waterproof sealant or resin coating to the inside of the vase can help prevent leaks.
What is the best filament for printing decorative vases?
For decorative vases, u003cstrongu003ePLAu003c/strongu003e is the most commonly used filament due to its ease of use and availability in many colors and finishes. u003cstrongu003eSilk PLAu003c/strongu003e is particularly popular for its shiny, metallic-like surface. For a more natural look, you could try u003cstrongu003ewood filamentu003c/strongu003e.
How long does it take to 3D print a vase?
The time required to print a vase depends on its size, complexity, and your printer’s settings. On average, a small vase can take a few hours, while larger or more intricate designs may take 10-12 hours or more. Using u003cstrongu003evase modeu003c/strongu003e can speed up the process.
Can I design my own vase for 3D printing?
Absolutely! You can create custom vase designs using beginner-friendly software like u003cstrongu003eTinkercadu003c/strongu003e or more advanced tools like u003cstrongu003eFusion 360u003c/strongu003e. Many 3D designers also modify existing STL files to add a personal touch to their vase designs.
Do I need a special 3D printer to print large vases?
No, but your printer should have a u003cstrongu003elarge build volumeu003c/strongu003e if you want to print taller or wider vases. Models like the u003cstrongu003eCreality Ender 3u003c/strongu003e or u003cstrongu003ePrusa i3 MK3Su003c/strongu003e are great options for printing medium to large vases. Just make sure your printer is capable of handling larger prints without warping issues.
Related posts:
 3D Printed Lighting: Illuminating Spaces with Unique Designs
  Can 3D Printed Vases Truly Hold Water?
  3D Home Decor Mistakes to Avoid:A Beginner’s Guide
  Are 3D Printed Coffee Mugs Safe for Hot Liquids?
  Can 3D Printed Wall Hooks Hold Heavy Items?
 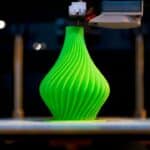 Waterproof Your 3D Printed Vases: A Step-by-Step Guide
  Can You Drink Out of 3D Printed Cups? (Safety Guide 2025)
  3D Printed Soundproof Wall Panels: Silence Your Space in Style
  Best 3D Printable Plant Pots for Small Apartments in 2025
  Bambu Lab A1 Mini vs Creality Ender 3 V3 SE: Which Should You Pick?
  How is AI Revolutionizing 3D Printed Home Decor Design in 2025
  46 Best Christmas Gifts 2025 For Everyone That’ll Make You Their Favorite Person in 2025