For years, the world of 3D printing seemed like a distant, complex frontier for many woodworkers. We’re comfortable with chisels, saws, and the scent of sawdust – not molten plastic and digital models. But what if I told you that embracing 3D printing could revolutionize your workshop, solve common frustrations, and even create new income streams?
Affiliate Disclosure
We participate in Amazon affiliate programs, earning fees from qualifying purchases via links at no extra cost to you. It’s how we keep this blog rolling and my 3D printers buzzing with fresh filament for reviews like this one!
A few years ago, I was exactly where you might be now: clueless about 3D printing, and frankly, a bit intimidated. I made all the mistakes – wasted thousands on the wrong printers, bought incompatible filament, and spent countless hours down the YouTube rabbit hole. Today, I manage a print farm of 16 machines, specializing in 3D printed woodworking accessories for people just like you. Everything I’m about to share comes from hands-on, daily experience. Consider this your free woodworker’s masterclass in 3D printing, designed to cut through the fluff and give you all the answers without the headache.
We’ll cover:
- Which 3D printers are worth your hard-earned money (and which to avoid like a dull chisel).
- The essential filament types for woodworking projects.
- Simple software settings to achieve professional-looking prints every time.
- How to access a treasure trove of 3D files, even if you’re not a designer.
- And most importantly, what to do when things inevitably go wrong.
Let’s dive in and demystify 3D printing for the modern woodworker.
FDM vs. SLA: Why We’re Sticking with the “Hot Glue Gun” Method
There are two primary types of 3D printing:
- SLA Printing: This method uses light to cure liquid resin into solid objects. While it offers incredible detail, it’s also expensive, messy, involves chemicals, and requires significant post-processing. Personally, I’m out at “messy chemicals.”
- FDM Printing (Fused Deposition Modeling): This is where our focus will be. Imagine a computer-controlled hot glue gun, meticulously layering thin strands of melted plastic to build an object from the ground up. It’s essentially a CNC machine that stacks material instead of removing it. FDM is the most common and affordable option, making it perfect for woodworkers looking to integrate 3D printing into their craft.
Related: Top High-Resolution 3D Printers for 2025: FDM and Resin Picks
Understanding the Basics: Filament, Hot Ends, and Nozzles
At the heart of FDM printing is filament – essentially a spool of plastic, ranging from $20 to $50, that comes in various types, colors, and qualities. We’ll dive deeper into filament choices soon, but be warned: it’s easy to accumulate hundreds of spools (ask my kids’ college fund). The filament feeds into an extruder, travels through a tube, and enters the hot end, where it’s heated to over 200°C. The molten plastic then pushes through a nozzle onto a specialized print bed, adhering as it cools, layer by layer, until your part is complete.
Crucial Components to Note:
- Hot Ends: Cheaper printers often come with hot ends that limit the safe printing temperature. This becomes an issue if you want to use advanced materials with higher melting points.
- Nozzles: Stainless Steel Nozzles are fine for basic plastics like PLA. For abrasive materials like carbon fiber or metallic filaments, you’ll need a hardened steel nozzle. A 0.4mm nozzle is the “Goldilocks” size – a perfect starting point, offering a balance of speed and detail. Smaller nozzles (0.2mm) provide finer detail but are slower, while larger ones (0.6mm) print faster but sacrifice some quality. Stick with 0.4mm to begin.
The Print Bed: Your Foundation for Success
The print bed is where your object takes shape. While some “animals” use glass beds, I highly recommend a magnetic PEI adhesion bed, either smooth or textured. Their flexibility makes removing finished prints incredibly easy. Start with a textured bed for better adhesion.
Slicing Your Vision: The Software That Brings Models to Life
Before your printer can create a physical object, a 3D model needs to be “sliced” into hundreds of thin layers. This is done using free software called a slicer. This is where much of the magic happens, and mastering a few key settings can elevate your prints from amateur to professional, saving you time and wasted filament. We’ll explore these crucial settings shortly.
The True Cost of 3D Printing: Don’t Sweat the Electricity Bill
Worried about electricity costs? Don’t be. An average 3D printer uses about 100 watts (0.1 kilowatt-hours). At an average cost of $0.10 per kWh, that’s just one penny per hour of printing! You could run a printer for 8 hours a day, 5 days a week, for an entire month and only spend about $1.60 on electricity. Your coffee maker likely uses more power. Save your money and skip the electricity monitoring device.
Choosing Your Weapon: Which 3D Printer Should You Buy?
This is where many beginners stumble. Let me save you from making my expensive mistakes. If you’re looking for the best 3D printers in 2025, it’s worth doing your research.
- Creality Ender 3 V2 (and similar clones): My first printer, around $350. I eventually replaced almost every weak component. While popular and cheap (you can find them for $100 used), they’re slow and notoriously unreliable for consistent, high-volume printing. Many beginners hate them because they’re fussy and frustrating. Pass on this one. There’s a reason they’re often found on Craigslist.
- Prusa Mini Plus: I paid $450. Smaller print bed than the Enders, same print quality, and more expensive. Waste of money.
- Prusa i3 Mark III: I bought two at $800 each, hoping for a significant upgrade. Here’s a hot take: I don’t love them. While more stable and reliable than an Ender, they’re slow, and frankly, I could get my cheap Enders to print just as well with some tweaking. Prusa pioneered much of this technology, but they’re falling behind. As my friend Travis said, “Prusa has become the Blackberry of 3D printers.” At $1100+ for the new Mark IV, you can do much better.
- Bambu Lab P1P: When Bambu Lab emerged, I was skeptical, having seen many overseas companies promise revolutionary tech only to disappear. But the P1P sent shockwaves. It’s incredibly fast (and costs around $500, making it faster than my upgraded Enders. However, for a woodworker, I don’t recommend it. You want an enclosed chamber to keep dust out and regulate print temperature.
- Bambu Lab X1C: This is the flagship model, costing $1200. It prints at the same speed as the P1P but includes an enclosure, touchscreen, cameras for print failure detection, and an upgraded nozzle/extruder for abrasive filaments. It’s a beautiful, near-perfect printer, and I love mine. But if you’re just starting, there’s a better value.
- Bambu Lab P1S (The Sweet Spot!): This is the middle child of Bambu Lab’s top-tier line and, in my opinion, the best value 3D printer for woodworkers. I replaced all 12 of my Enders with 10 P1S machines for my business. You get the same print speeds and quality as the X1C at half the price!
- Features: Enclosed chamber (essential for a dusty workshop), same large print bed, no manual calibration, and minimal setup (printing in 15 minutes out of the box).
- Savings: The X1C’s touchscreen and camera features add $600 to the price. I use my phone as a touchscreen and rely on slicer tricks (which I’ll share) for perfect first layers every time, eliminating the need for the X1C’s detection software.
- Recommendation: If your budget allows, the P1S is the best all-around choice.
- Bambu Lab A1: If the P1S is too much, the A1 is Bambu’s open-frame printer (similar to the Ender/Prusa design). While my friends love them for hobbyist use, especially with Anycubic Kobra S1 Combo vs Bambu Lab A1 Combo comparisons showing its strengths, for a workshop environment, an enclosed printer like the P1S will serve you much better in the long run.
Related: FLASHFORGE Adventurer 5M: The Best 3D Printer Under $300 in 2025
The AMS: Multi-Color and Material Printing (and My Conflicted Feelings)
You’ve probably seen the AMS (Automatic Material System) sitting atop many Bambu Lab printers. It’s an accessory that allows for multi-color and multi-material printing.
My Nuanced Thoughts:
- Initial Impression: It felt like a “version 1.0” product – all plastic and a bit cheap for its $350 price tag. At $99-$199, it would be a clear value.
- Pros:
- Multi-Color Prints: Use one AMS for four colors, or link up to four for 16-color prints.
- Seamless Spool Transition: If a spool runs out mid-print, the AMS automatically switches to a backup, preventing failed prints and waste.
- Multi-Material Printing: Use special support filaments that break away easily or even dissolve.
- Dry Filament Storage: Airtight seals and desiccant keep filament dry, with a built-in humidity sensor.
- RFID Tag Integration: Bambu Lab filaments have hidden RFID tags, allowing the AMS to automatically load printing profiles – it feels like cheating, and it’s fantastic!
- Cons: Pricey for casual use.
- Recommendation: If multi-color prints or having multiple filaments ready to go are a must-have for your projects, the AMS is a powerful tool. Otherwise, it’s a luxury I don’t use as much as I thought I would.
Related: Best Multicolor 3D Printers of 2025 for Etsy Sellers Boosting Sales
Finding Your Models: A Treasure Trove of 3D Files
You don’t need to be a 3D designer to start printing. Thousands of free and affordable 3D models are available online. Many designers also sell specialized, high-quality designs for the cost of a cup of coffee – a small price to pay for their intellectual property and design time.
- Thingiverse: (B- to C+) Free, but you’ll wade through ads and some lower-quality files. Still, good finds are there.
- Printables (by Prusa): (A+) Excellent models and designers, no ads. A fantastic resource.
- MakerWorld (by Bambu Lab): (Growing A) Initially sparse, it’s rapidly expanding. A unique feature: find a file on your phone and send it directly to your Bambu printer via the “Handy” app, bypassing your computer and slicer.
- STLs (Standard Tessellation Language) Files: These are the common file type you’ll download, and they work with any 3D printer. You’re not locked into a specific brand.
Important Notes:
- Remixes: The 3D printing community thrives on remixes, where users build upon existing designs, make improvements, and share them. It’s an incredible collaborative process.
- Commercial Licenses: Pay attention to commercial licenses! Many designers offer files for free but restrict commercial use. Selling prints of commercially-restricted files is unethical and illegal.
- Our Woodworking Bundle: To get you started, my design partner Steve and I created a bundle of essential woodworking files that we use in our shops. They’re practical, easy to print, and will give you quick wins. Find the link in the description to my online store.
Want to design your own files?
- Tinkercad: (Beginner-friendly) Free, basic, and great for simple jobs without overwhelming you. I still use it today for quick mock-ups!
- Fusion 360: (Advanced) The “Photoshop equivalent” for 3D modeling. Can be overwhelming, but courses like Bob from “I Like To Make Stuff’s” Fusion course are tailored for makers. You can also find tons of free tutorials on YouTube from channels like “Product Design Online.”
Slicer Secrets: Pro-Level Prints Every Time
Opening a slicer for the first time can be intimidating. But with these tricks, you’ll achieve perfect prints 99% of the time, often outperforming the advanced features of more expensive printers.
The “Perfect First Layer” Secret:
A strong foundation is critical. Here’s how to get the best first layer adhesion:
- Bed Temperature: Set the first layer to 5°C hotter than usual (e.g., 65°C for the first layer, then 60°C).
- Nozzle Temperature: Set the first layer to 5°C hotter than usual (e.g., 225°C for the first layer of PLA, then 220°C).
- Layer Height: Bump up the first layer height to 0.28mm (if printing at 0.2mm).
- Nozzle Width: Increase the first layer width to 0.55mm or 0.6mm (for a 0.4mm nozzle). You can go up to 150% of your nozzle width.
- First Layer Speed: Slow it down to 30 mm/s. This is slow, but crucial.
These combined settings create a slightly thicker, wider, and squishier first layer, ensuring maximum adhesion and a perfect base.
Print Bed Hygiene:
- Avoid Touching: Oils from your hands can prevent adhesion.
- Clean Regularly: Wash the bed in warm, soapy water, dry it, then spray with 91% IPA (isopropyl alcohol) and wipe clean.
- Pro Tip: Never spray IPA on a hot print bed – it evaporates too quickly, reducing adhesion.
- Elmer’s Glue Stick: For extra adhesion (especially with PETG), or as a buffer layer to prevent parts from fusing to the bed, apply a thin layer of cheap Elmer’s glue stick. Don’t buy expensive “3D printing glue.”
Troubleshooting Common Problems
- Stringing: Fine wisps of plastic between parts. Caused by moisture, hardware issues, slicer settings, or design geometry. If troubleshooting fails, try replacing your nozzle.
- Clogs/Under-extrusion: Plastic not flowing smoothly. Often due to low nozzle temperature or old filament. Signs: Prints look thin or incomplete (under-extrusion).
- Solutions:
- Increase Nozzle Temp: If you hear clicking in the extruder, raise the temperature in 5°C increments until flow improves.
- Thin Needle: Use the needle that came with your printer to clear the hot nozzle.
- Cold Pull: For stubborn clogs, cool the nozzle to 0°C, then heat to around 120°C. Gently pull the filament out – it will grab the clog as it passes its melting point. (Do this 2-3 times with white PLA to see the gunk).
- Increase Nozzle Size: For finicky filaments like PETG-CF, a 0.6mm nozzle can prevent clogs and improve prints.
- Solutions:
Slicer Essentials in 90 Seconds:
- Load File: Drag and drop your STL into the slicer.
- Orientation: Use the “Auto” button or manual tool to orient the model flat on the bed.
- Scale: Adjust size here (common for fitting parts like dog hole covers).
- Duplicate: Right-click, copy/paste, or “Fill Bed with Copies.”
- Walls & Infill: For testing prints, reduce walls and infill to save time and material. For normal prints, start with 3-4 walls and 20% infill.
- Raft: If prints aren’t sticking, add a raft (a disposable base layer that snaps off easily).
- Supports: Click the button to add automatic supports (tree supports are excellent).
- Cut File: Cut a large file into smaller pieces, print, and then join them.
Congratulations, you now know enough to start printing!
Beyond the Hobby: Building a Business with Shopify
Have you ever encountered a problem in your woodworking that no one else has solved? Those are prime opportunities for 3D printing solutions that others will pay for. This is exactly what I did with track saw accessories and trim router bases. I designed solutions, offered them to the world, and now ship globally through Shopify. If you’re wondering Can You Sell 3D Printed Decor Online? Tips for Success, the answer is a resounding yes!
Shopify makes running an online business incredibly simple, even if you don’t know how to code. Their drag-and-drop editor, live view tools, marketing features, and back-office dashboards make managing orders, inventory, and product listings a breeze. If you have a business idea, visit shopify.com/witworks to get started. You could be creating Top 20 Profitable 3D Printed Products to Sell in no time.
Filament Deep Dive: Quality and Types
Just like wood, dry filament is crucial. Moisture in filament leads to clogs, under-extrusion, and weak parts. Investing in The Best Filament Dryers for 3D Printing is highly recommended.
- Quality Matters: I learned the hard way that cheap filament (especially from no-name Amazon brands) is often poorly dried. You get what you pay for. Higher quality filament prints beautifully, with no stringing or clogs.
- My Recommendations: For commercial prints, I use Proto-Pasta (around $50/roll, but I buy in bulk). For excellent quality and value, I’ve been highly impressed with Bambu Lab’s filaments. They are surprisingly affordable, offer a wide range of strength options, and the RFID tags make printing incredibly easy with their machines. If you have a Bambu printer, start with their filament – it feels like cheating!
- Storage: Filament is hygroscopic (absorbs moisture from the air). Store your filament in airtight, waterproof totes with desiccant packs. Resealable bags that come with filament are also great for short-term storage.
Related: The Best Filament Dryers for 3D Printing: Top 10 Picks
Essential Filament Types for Woodworkers:
- PLA (Polylactic Acid):
- Pros: Cheap, easy to print, derived from renewable resources (corn starch). Great for basic prints, especially those not exposed to heat or mechanical stress. Comes in a huge variety of colors.
- Cons: Melts easily in hot environments (like a hot garage), brittle, not very strong. Don’t use for heavy tool holders in a warm workshop.
- Verdict: Your starting point. If you can’t print PLA, this hobby might not be for you.
- PETG (Polyethylene Terephthalate Glycol):
- Pros: Stronger, more durable, more impact-resistant, slight flexibility, resists chemicals/water, higher temperature resistance. You can even find great options like the SUNLU Filament Dryer S4 Review.
- Cons: Requires a hot end that reaches higher temperatures (cheaper printers may struggle). Can stick too much to the build plate (use glue stick!).
- Verdict: Your next milestone after PLA. Great for workshop tools.
- ABS (Acrylonitrile Butadiene Styrene):
- Pros: Durable, high impact resistance.
- Cons: Tricky to print due to warping, emits toxic fumes (print in a well-ventilated area).
- My New Favorite: Bambu Lab’s ABS-GF (Glass Fiber) is a game-changer. It’s cheaper than my PETG supplier, stronger, and prints perfectly. I’m transitioning all my commercial prints to this!
- ASA (Acrylonitrile Styrene Acrylate):
- Pros: Modified ABS for extreme weather and UV resistance. Crazy UV/temperature resistance, high impact strength. Great for outdoor prints (birdhouses, drone parts).
- Cons: Tends to warp, emits harmful fumes (ventilate!).
- PA6 (Nylon 6):
- Pros: Superior strength, stiffness, exceptional thermal resistance. Used in car parts and tool components.
- Cons: Highly sensitive to humidity (needs drying before use), more expensive (around $43/spool).
- TPU (Thermoplastic Polyurethane):
- Pros: Flexible and durable (like rubber and plastic combined). Car floor mats and phone cases often use TPU.
- Cons: Challenging to print (stringing, cosmetic issues), needs slower printing, more expensive (around $41/spool). I haven’t mastered it yet.
Related: Best FLASHFORGE Filaments of 2025!
Essential Tools for Your 3D Printing Journey
Beyond the printer itself, these small tools will become indispensable:
- Flush Trimmers: (Non-negotiable!) Cut filament at a 45° angle for smooth feeding. Also great for flush-cutting extra material from prints.
- Digital Calipers: Essential for design and verifying print accuracy.
- Brass Brush: A cheap one from Harbor Freight is perfect for cleaning nozzles.
- Thin Needle: The one that came with your printer – crucial for clearing clogs.
- Dremel: Handy for cleanup tasks and sanding parts.
- Putty Knife/Spatula: For removing prints from the bed.
- Elmer’s Glue Stick: (See above) Cheap and effective.
- 91% IPA: For cleaning print beds. Higher percentage evaporates faster. Don’t spray on a hot bed.
- Heat Press: For setting threaded inserts into 3D printed parts (super cool!).
- Filament Dryer: A must-have for wet filament, especially if you live in a humid environment.
Related: 35+ Super Useful 3D Printing Tools for 2025
Unleash Your Creativity: 10+ Game-Changing Woodworking Prints
This is my favorite part – the sheer creativity of the 3D printing community! I’ll rapid-fire through some fantastic prints; links will be in the description. For a deeper dive, check out this Woodworking 3D Printing Guide.
- Cordless Battery Holders: DeWalt (my favorite design) Makita (personal favorite, easy to print) Milwaukee Ryobi 18V (search on Thingiverse or Printables) Ego Batteries (slim, easy to print)
- Crucial Tip: For heavy tools, use PETG! PLA will melt in a hot garage, sending your tools crashing down (ask me how I know).
- Miter Sled Bars: Print your own instead of making hardwood runners or buying expensive aluminum ones. Super easy and satisfying.
- Sander Wall Mounts: Files for virtually any sander, even Surf Prep 3×4 and Festool.
- Ratchet Clamp Storage: Great designs, including a stop block to prevent collapse on an MFT table.
- Vacuum Hose Adapters: (Mind-blowing!) 77 different adapters for almost any dust collection connection you’ll ever need, all free!
- Flat Hose Tunnel: A cool way to manage flat hoses.
- Setup Blocks/Shims: Ditch the playing card trick.
- Chisel Sheaths/Holders/Plane: Replacements for lost sheaths, custom holders, even a mini chisel plane.
- Paint/Epoxy Mixers: Quick and disposable designs.
- Starbond Superglue Holder: Keep your glue under control.
- Router Lift Inserts: Custom inserts for your router lift.
- Self-Centering Drill Guide: Brilliant and effective.
- Drywall Anchors: Never run to the store for one or two again – print them! While you’re at it, ponder, Can You Use 3D Printed Wall Hooks for Heavy Items?
- Battery Organizers: Awesome designs for keeping batteries neat, even in your kitchen.
- Bandsaw Zero Clearance Inserts: Search Printables.com for your specific bandsaw.
- SawStop Utility Drawer: A secret drawer for your fence (destroy your hotdogs, Ben Myers!).
- Jig Handles: Print your own handles instead of buying them.
- F-Style Clamp Stands: Give your clamps a stable base.
- Milwaukee Speed Square Holders: For both sizes.
- Domino Dry Fit/Glue Nozzle/Bit Organizer: Reduced-size Dominos for dry fits, custom glue nozzles, and a micro sustainer insert to organize your bits and wrench.
- Festool STLs: Festool has released some free STLs – hopefully, more brands follow suit!
- Matchfit Fixture Bits and Knobs: Print your own accessories.
- Ratchet Strap Holders: The answer to keeping truck straps organized.
- Gridfinity: (The Best for Last!) The most comprehensive and flexible storage system created by a sarcastic cyborg. Imagine a modular system for every single item in your shop – that’s Gridfinity.
I hope this masterclass has demystified 3D printing and ignited your excitement. It’s a powerful tool that, when integrated thoughtfully, can profoundly enhance your woodworking, solve problems, and open up new possibilities for creativity and even commerce. Happy printing!
Related posts:
 Printing Your Way to Riches: Selling Your 3D Printed Decor Online!
  Top 20 Profitable 3D Printed Products to Sell
  How Long Does 3D Printing Take? A Beginner’s Guide to Print Times
  Can I Become a Billionaire from 3D Printing?
  Want To Know How Hot Can a 3D Printer Get?
  5 Surprising Reasons Why 3D Printed Houses Aren’t Taking Over Yet
 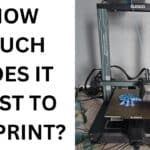 How Much Does It Cost To 3D Print?
  3D Printer Terminologies and Explanations for Newbies
  Is a Home 3D Printer Worth It? 10 Home 3D Printer Disadvantages!
  Top Websites for 3D Printing Services Near You in the US (2025)
  Where to Buy a 3D Printer in the USA: Top Picks for 2025
  Creality K1 SE vs Anycubic Kobra 3 Max Combo: Which 3D Printer Reigns Supreme for Your Vision?