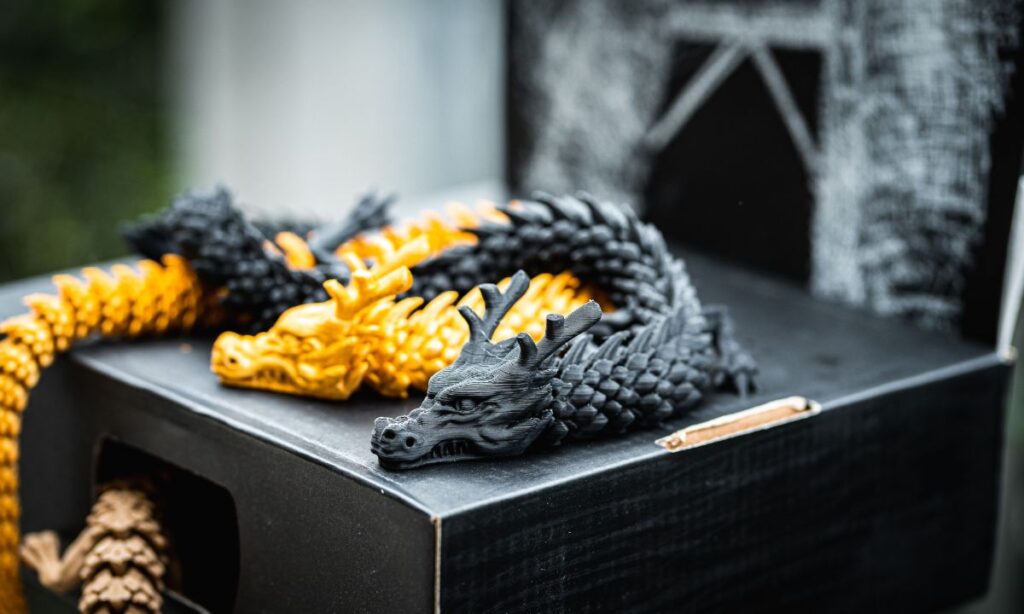
Crafting a 3D printed dragon is a rewarding journey, transforming a digital design into a stunning, mythical masterpiece. Share your creation with the 3D printing community and dive into your next epic project!
Have you ever dreamed of bringing a dragon to life?
Affiliate Disclosure
We participate in Amazon affiliate programs, earning fees from qualifying purchases via links at no extra cost to you. It’s how we keep this blog rolling and my 3D printers buzzing with fresh filament for reviews like this one!
Imagine a majestic, fire-breathing creature that’s uniquely yours, crafted not by magic but by your own hands using a 3D printer. Creating a 3D printed dragon is more than just a project; it’s an adventure that combines art, technology, and a dash of fantasy. Whether you’re a hobbyist, a DIY enthusiast, or simply fascinated by mythical creatures, building your own 3D dragon model opens up a world of creativity and skill-building.
So, let’s embark on a journey to transform mere filament into a fantastic dragon sculpture you’ll proudly display. This guide will walk you through everything you need to know about 3D printing your own dragon, from selecting the right design to painting and finishing your masterpiece. Get ready to ignite your imagination and start creating a dragon that’s uniquely yours!
How to Build Your Own 3D Printed Dragon? (YouTube Video)
1. Why Build a 3D Printed Dragon?
Building a 3D printed dragon is a satisfying DIY project with multiple benefits:
Personalization
The beauty of 3D printing lies in the endless customization. From the dragon’s wingspan to its pose and texture, you can tweak every detail.
Skill Development
Whether you’re new to 3D printing or a seasoned pro, crafting a dragon challenges your skills in design, assembly, and painting.
Impressive Final Product
A dragon figurine, especially one you’ve made yourself, is a unique piece that adds character to any collection or display.
Affordable Fantasy
Instead of purchasing a costly figurine, you get to print, assemble, and finish your dragon at a fraction of the cost.
2. Choosing the Right 3D Dragon Model for Your Project

The right model is key to an enjoyable experience. Here are some factors to consider:
Free vs. Paid Designs
Many 3D design websites, like Thingiverse, MyMiniFactory, and Cults3D, offer various dragon models. While some are free, consider investing in a paid, high-quality design if you’re looking for complex details or specific features.
Easy-to-Use Software
If you want to create or modify your own dragon model, software like Tinkercad or Blender is great for beginners and advanced users alike. These programs allow you to adjust the dragon’s body shape, add intricate scales, or create a custom tail or wing design.
Important Considerations
Scale: Choose a size that fits your 3D printer’s capabilities. Smaller dragons print faster, but larger dragons have a more impressive presence. Complexity: If you’re new to 3D printing, start with a simpler model or segmented parts. As you gain experience, you can tackle more intricate designs. Multi-Part Assembly: Some dragon models print in multiple pieces for easy assembly and greater detail, especially for wings and limbs.
3. Preparing Your Dragon for 3D Printing
Printing a dragon requires thoughtful preparation to ensure a smooth process and optimal results.
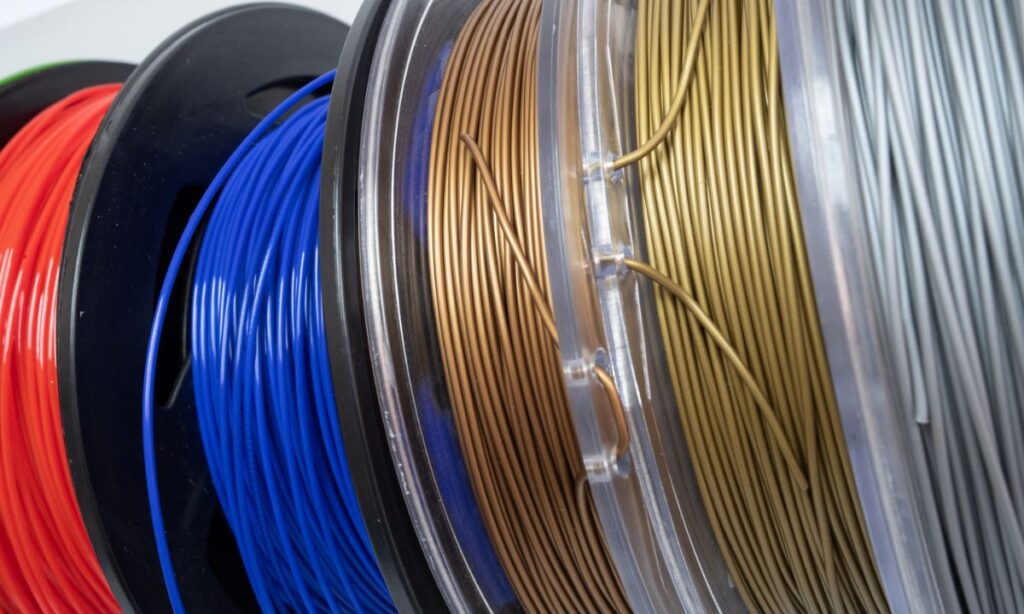
Select the Right Filament
Choosing the right filament can greatly impact the final look of your dragon: PLA: A common, user-friendly option ideal for beginners. PETG: Slightly tougher than PLA, adding extra durability for larger dragons or detailed textures. ABS: Great for experienced users as it’s durable and heat-resistant, though it requires careful handling.
Optimize Your Print Settings
Careful adjustments to your printer’s settings will enhance your dragon’s quality. Layer Height: A lower layer height (around 0.1 mm) gives better detail, especially for scales and facial features. Infill Percentage: Choosing 10-20% infill strikes a balance between durability and material usage. Supports: Adding supports is crucial for any dragon model with wings or intricate poses, ensuring that extended parts print without sagging.
Test Printing
Printing a small section, like the head or a wing, can help you identify any issues with settings before committing to the full print. This will also save material and time if adjustments are needed.
4. Bringing Your Dragon to Life: Post-Processing and Assembly
After printing, post-processing transforms your dragon from a rough print into a polished masterpiece.
Smoothing and Sanding
Start with coarse sandpaper to remove any obvious print lines, then work your way to finer grits. For a flawless finish, consider a smoothing technique like acetone vapor smoothing for ABS, or applying a primer for PLA to hide layer lines.
Painting and Detailing
Painting adds depth and personality to your dragon. Acrylic Paints: These are widely available, easy to use, and come in a huge range of colors. Experiment with colors for shading, or use metallics for a unique look. Airbrushing: Ideal for smooth, even coats, particularly on larger areas like wings. It allows for gradient effects, perfect for creating a realistic dragon appearance.
Assembly Tips
For multi-part models, using adhesives like super glue or epoxy is common. For added security, consider using small screws or pins for joints, especially for larger dragons.
5. Displaying Your Finished Dragon Model
Your custom 3D printed dragon deserves to be showcased! Here are some creative display ideas:
Custom Stands: Design a base with rocks or a scenic element that fits your dragon’s look. Dioramas: Build a fantasy setting for your dragon, complete with miniature trees, stones, and even a castle or cave. LED Lighting: Consider adding LED lights to highlight your dragon’s features or make it look as if it’s breathing fire. RGB lighting can add dramatic effects to certain poses.
Troubleshooting Common Issues
When 3D printing complex models like dragons, challenges can arise that affect print quality. Here are some common issues you might encounter and how to fix them.
Poor Layer Adhesion
Layer adhesion issues often result in a fragile print that can easily break or delaminate. This is particularly common in larger prints with fine details, like dragon wings.
Solution: Increase the print temperature slightly to improve adhesion between layers. Additionally, ensure the bed is level, and consider using an enclosure to maintain temperature consistency, especially for materials like ABS.
Warping and Curling
Warping, where the base of the model lifts off the print bed, can ruin the shape of your dragon, especially around delicate details like tails or claws.
Solution: Use a heated bed and try adding a brim or raft to increase the contact area. Make sure the first layer is well-adhered by slowing down the print speed for that layer. Using materials like PLA, which has low warping tendencies, can also help.
Stringing
Stringing or “hairy” prints can occur when thin strands of filament stretch between different parts of the model, particularly problematic with complex dragon designs involving wings and other separated details.
Solution: Adjust retraction settings in your slicer software. Increasing retraction distance and speed can reduce stringing. Lowering the print temperature slightly may also prevent excessive filament flow that causes stringing.
Under-Extrusion
Under-extrusion results in weak, brittle prints due to insufficient filament being pushed through the nozzle, leading to gaps or thin spots. This can compromise the strength of intricate dragon parts.
Solution: Check for clogs or partial blockages in the nozzle and ensure the extruder gears are properly gripping the filament. Increasing the extrusion multiplier in your slicer software may also help ensure a steady flow.
Support Removal Challenges
Dragons with complex shapes often require supports, which can be difficult to remove cleanly without damaging the model.
Solution: Use support settings that make removal easier, such as lowering the support density or using tree-like support structures. For intricate areas, try printing with soluble supports if your printer allows dual extrusion, as these dissolve away, preserving fine details.
Bed Adhesion Issues
If the print doesn’t stick to the bed properly, it may shift during printing, leading to deformations. This is especially common for larger dragons with small, initial contact points.
Solution: Ensure the print bed is clean and leveled, and consider applying a thin layer of adhesive such as glue stick or blue painter’s tape. For stubborn prints, try using a textured print bed or specialized adhesion aids like a PEI sheet.
Detail Loss in Fine Features
Dragons often have delicate features that may be lost if the print quality isn’t high enough.
Solution: Use a smaller nozzle size, like 0.2 mm, to capture finer details. Reduce the layer height, and lower the print speed slightly to improve resolution. High-quality filament can also enhance the sharpness of intricate details.
Conclusion
Creating a 3D printed dragon isn’t just about following a blueprint; it’s about bringing a mythical creature to life with your own hands.
As you watch your dragon take shape, from digital design to printed parts, and finally into a polished display piece, you’ll feel a sense of accomplishment that’s hard to match. So whether you’re starting small or going all out with a giant, multi-colored dragon, this project is bound to become one of your most memorable DIY experiences. Take photos, share your dragon with the 3D printing community, and don’t hesitate to embark on your next fantasy-inspired project.
With every new creation, you’re expanding your skills and opening doors to endless possibilities in the world of 3D printing.
Frequently Asked Questions (FAQs)
Can beginners try 3D printing a dragon?
Yes, there are beginner-friendly dragon models that are easy to print and assemble. Start with simpler models and advance to more detailed ones as you gain experience.
Which filament is best for 3D printing a dragon?
PLA is ideal for beginners as it’s easy to print with, while PETG and ABS are good choices if you need more durability or plan to paint your dragon.
Do I need a large 3D printer to make a dragon model?
Not necessarily. Many models are designed to be printed in parts, which can be assembled later, allowing you to print large dragons even on standard-sized printers.
What paint works best for 3D printed dragons?
Acrylic paints work very well, as they adhere easily to PLA and ABS surfaces. Airbrushing is also a popular choice for adding gradients and special effects.
How long does it take to 3D print a dragon?
Print time depends on size, detail, and printer settings. Small models may take a few hours, while large, detailed dragons can take up to a few days to complete.
Related posts:
 99% of People Think What Glue to Use for 3D Prints: The Ultimate Guide
 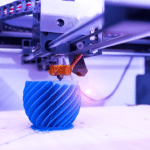 DIY 3D Printed Decor: An Inspiring Beginner’s Guide
  What Are 50 Insanely Cool Things to 3D Print?
  The Future of 3D Printed Home Decor: An Introduction
  The Environmental Impact: How 3D Printing Contributes to Sustainable Decor
  Best 3D Printers of 2025: Top 10 Picks for Speed, Quality & Budget (USA Tested)
  How to Choose the Right 3D Printed Decor for Your Home Style
  How Much Does It Cost To 3D Print?
  The Ultimate 3D Printer Tier List 2025: Best Machines for Beginners, Pros & Every Budget
  The Ultimate Guide to Advanced 3D Printing Filaments: Unlocking Properties, Real-World Uses, and Pro Secrets
  3D Printed Soundproof Wall Panels: Silence Your Space in Style
  Sovol SV08 Core-XY 3D Printer: The Ultimate Large-Format Solution for Stunning Home Decor