
Regular resin printer maintenance—precise calibration, timely consumable swaps, and thorough cleaning—boosts longevity and ensures flawless prints, saving you time and hassle.
Why Resin Printer Maintenance Matters
Resin 3D printers deliver stunning detail but require meticulous care to avoid failed prints, damaged parts, and costly repairs. Neglecting maintenance leads to:
- Layer adhesion failures
- Scratched LCD screens
- Resin leaks ruining components
- Shortened printer lifespan
Affiliate Disclosure
We participate in Amazon affiliate programs, earning fees from qualifying purchases via links at no extra cost to you. It’s how we keep this blog rolling and my 3D printers buzzing with fresh filament for reviews like this one!
This guide covers calibration, consumables, cleaning, and pro tips to keep your printer running like new.
Upgrade your setup with the ELEGOO Mars 5 Ultra 9K Resin 3D Printer ($349) on Amazon now!
Resin Printer Maintenance Guide: Calibration, Cleaning & Replacement Tips (2025)
1. Calibration: The Foundation of Perfect Prints
A. Printer Leveling
Why: Ensures the resin vat and build plate are perfectly horizontal.
How:
- Place a bubble level on the printer’s frame.
- Adjust leveling feet until the bubble is centered.
- Recheck after moving the printer.
Pro Tip: Use anti-vibration pads to stabilize your printer on uneven surfaces.
B. Build Plate Leveling
Why: A misaligned plate causes uneven layers and adhesion issues.
Step-by-Step:
- Loosen the build plate screws.
- Place a sheet of paper over the LCD.
- Lower the plate until it grips the paper snugly.
- Tighten screws in a star pattern (alternate diagonally).
- Recheck by manually moving the plate down.
Troubleshooting: If prints stick to the FEP instead of the plate, re-level and increase bottom layer exposure.
C. Z-Axis Height Calibration
Why: Prevents LCD screen damage and ensures proper layer adhesion.
Steps:
- Home the build plate.
- Insert a 0.1mm feeler gauge between the plate and LCD.
- Adjust the Z-offset until the gauge slides with slight resistance.
Tool Recommendation: Use a digital caliper for precise measurements.
2. Consumables: Replace Before They Fail
A. Resin Tank & FEP Film
Lifespan: 30-50 prints (varies by resin type).
Signs to Replace:
- Cloudy or scratched FEP
- Dimpled surface
- Failed prints sticking to the film
How to Replace FEP:
- Drain resin and remove the tank.
- Unscrew the frame and remove old FEP.
- Stretch new FEP taut (use a FEP tensioning tool).
- Reassemble and test with a screen exposure test.
Pro Tip: Use nFEP film for easier release and longer lifespan.
B. LCD Screen
Lifespan: 1,000-2,000 hours (check manufacturer specs).
Signs of Wear:
- Dead pixels or dark spots
- Light bleeding during exposure
- Resin curing unevenly
Replacement Steps:
- Power off and unplug the printer.
- Remove the resin tank and unscrew the LCD housing.
- Disconnect the ribbon cable and install the new screen.
Cost: 50−50−150 (model-dependent).
C. Build Plate
Maintenance:
- Sand with 400-grit sandpaper every 20 prints for better adhesion.
- Avoid metal scrapers—use a plastic razor blade.
Replacement: Needed if gouged or warped (rare).
3. Cleaning: Prevent Resin Buildup & Damage
A. Post-Print Routine
- Resin Tank:
- Filter resin through a mesh sieve into a sealed bottle.
- Wipe the tank with IPA (90%+) and a lint-free cloth.
- Build Plate:
- Soak in IPA for 10 minutes, then scrub with a soft brush.
- LCD Screen:
- Cover with optical cleaning film during tank removal.
- Clean spills immediately with screen-safe wipes.
Never Use: Acetone or abrasive pads—they damage coatings.
B. Deep Cleaning (Monthly)
- Disassemble the vat and soak parts in IPA overnight.
- Lubricate Z-axis rods with PTFE lubricant.
- Inspect UV light source for dust or resin splatter.
4. Advanced Maintenance & Troubleshooting
A. Firmware Updates
- Check the manufacturer’s site quarterly for updates.
- Fixes bugs, improves exposure algorithms, and adds features.
B. Environmental Factors
- Temperature: Keep the room at 25-30°C (77-86°F) for optimal resin flow.
- Humidity: Use a dehumidifier in damp climates to prevent resin absorption.
C. Common Issues & Fixes
| Problem | Solution |
|---|---|
| Prints sticking to FEP | Re-level plate, increase bottom exposure, or tighten FEP. |
| Pixelated layers | Replace LCD screen. |
| Z-axis grinding | Lubricate rods or check stepper motor. |
| Resin leaks | Replace FEP immediately. |
🛠️ Resin Printer Maintenance Schedule
| Task | Frequency | Completed |
|---|---|---|
| Build plate leveling | Every 5 prints | |
| FEP film replacement | Every 30-50 prints | |
| LCD screen inspection | Monthly | |
| Z-axis lubrication | Every 3 months | |
| Full disassembly cleaning | Every 6 months |
FAQs: Resin Printer Maintenance
u003cstrongu003eHow often should I replace the FEP film?u003c/strongu003e
Every 30-50 prints, or at the first sign of cloudiness.
u003cstrongu003eCan I use Windex to clean the LCD?u003c/strongu003e
No! Use only u003cemu003eIPAu003c/emu003e or u003cemu003escreen-specific cleanersu003c/emu003e to avoid damage.
u003cstrongu003eWhy is my resin printer so loud?u003c/strongu003e
Lubricate the Z-axis rod and check for loose components.
u003cstrongu003eHow do I store resin long-term?u003c/strongu003e
Keep it in a u003cemu003ecool, dark placeu003c/emu003e and shake well before use.
Conclusion
Regular resin printer maintenance saves time, money, and frustration. By following this guide—calibrating meticulously, replacing consumables proactively, and cleaning thoroughly—you’ll extend your printer’s life and achieve flawless prints every time.
Need Parts? Check Amazon for FEP film, LCD screens, and resin tanks compatible with your model.
Upgrade your setup with the ELEGOO Mars 5 Ultra 9K Resin 3D Printer ($349) on Amazon now!
Related posts:
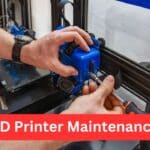 3D Printer Maintenance 101: Essential Tips
 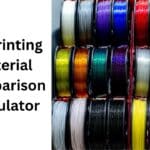 3D Printing Material Comparison Calculator: Avoid 3D Printing Disasters
  Which Operating System is Best for 3D Printing?
 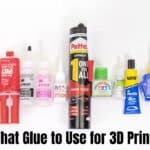 99% of People Think What Glue to Use for 3D Prints: The Ultimate Guide
 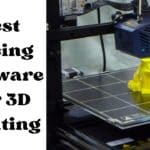 13 Best Slicing Software For 3D Printing: A Beginner’s Guide (December 2025 Updated)
  8 Must-Know File Formats for 3D Printing Success
  Best 3D Printing Software for Industrial Applications
  Resin vs FDM 3D Printing: Discover the Best Choice for You
  Best Linux Distro for 3D Printing: Print Like a Pro in 2025
  Resin vs Filament 3D Printing: Which Technology Wins for Your Projects?
  How to Use Grok 3 for 3D Printing: A Comprehensive Guide for Enthusiasts