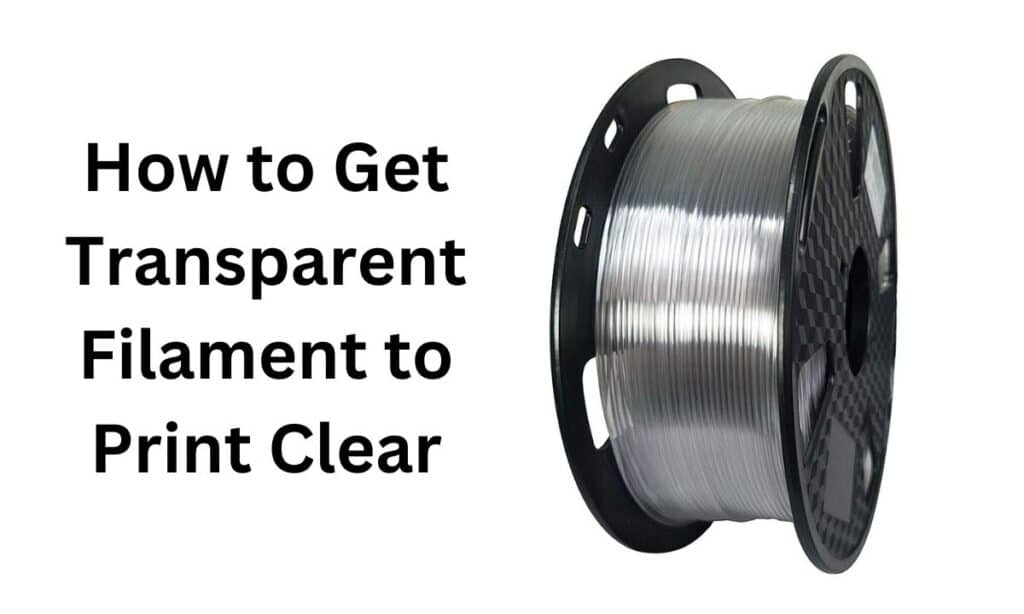
Have you ever tried printing with transparent filament, only to be left with a cloudy or frosted result instead of the crystal-clear effect you were hoping for?
Affiliate Disclosure
We participate in Amazon affiliate programs, earning fees from qualifying purchases via links at no extra cost to you. It’s how we keep this blog rolling and my 3D printers buzzing with fresh filament for reviews like this one!
You’re not alone—getting a truly clear 3D print is one of the most common challenges for anyone using clear filament. But the good news is that with the right print settings and a few helpful techniques, you can achieve impressive clarity in your 3D prints.
Let’s explore some key tips on how to get transparent filament to print clear.
Can You Really Print Clear with Transparent Filament?
Many people wonder if it’s truly possible to achieve a clear, glass-like appearance using transparent filament. The answer is yes—though it requires precise settings, material knowledge, and a little bit of patience. Achieving print transparency isn’t a myth; it’s all about understanding the material’s properties and optimizing your print settings.
Why the Struggle?
The cloudiness or frosted look in transparent prints often happens due to the way light interacts with the material. Small air pockets, layer lines, and internal reflections caused by the filament can scatter light, reducing clarity. Fortunately, these issues can be minimized with some careful adjustments and techniques.
Scientific Breakdown: Why Clear Filament Isn’t Always Clear
Transparent filament, like clear PLA, PETG, or even polycarbonate, has different refractive properties than opaque filaments. Refractive index, or how much light bends as it passes through, plays a huge role in how clear the final product looks.
Opaque filaments absorb or scatter light, while clear filaments allow more light to pass through. However, if there are tiny air bubbles or irregular layer lines in the print, these can scatter light, making the object appear cloudy.
To maximize transparency, the goal is to create smooth surfaces and minimize internal gaps. Now, let’s dive into the techniques you can use to get that crystal-clear result.
Practical Tips to Improve Transparency in 3D Printing

1. Choose the Right Filament
Not all transparent filaments are created equal. PLA and PETG are common choices, but PETG typically produces better results for transparency due to its higher melting point and smoother extrusion capabilities. Specialty filaments like polycarbonate (PC) or T-Glase (short for ‘tough glass) PETT (Polyethylene coTrimethylene Terephthalate) can also yield very clear results but may require a higher-end printer to handle the increased temperature.
2. Use a Low Layer Height
What to Do:
Set your printer’s layer height to the lowest possible setting, ideally 0.1 mm or lower. Lower layer heights create finer, more compact layers, reducing the amount of light-scattering gaps within the print.
Why It Works:
Lower layer heights reduce visible lines in the print and result in smoother walls, which is essential for allowing light to pass through without being scattered.
3. Increase Extruder Temperature Slightly
What to Do:
For PETG and PLA, try increasing your extruder temperature by 5-10°C above the recommended settings. This helps the filament to flow more smoothly and fill any gaps between layers, which can improve clarity.
Why It Works:
A higher temperature allows the plastic to meld together more effectively, eliminating tiny air bubbles and gaps that can cause the print to appear cloudy.
4. Reduce Print Speed
What to Do:
Print at a slower speed, around 30-40 mm/s. Slower printing allows each layer to be laid down more precisely and evenly, further minimizing gaps between layers.
Why It Works:
Slower speeds enable better filament bonding, helping to create a more uniform, transparent surface. Fast printing often leaves gaps, leading to a frosted look instead of clear.
5. Adjust Cooling Settings
What to Do:
Turn off cooling fans or set them to the lowest speed. Excessive cooling can cause the filament to harden too quickly, creating small gaps and reducing transparency.
Why It Works:
Allowing the filament to cool more slowly reduces the formation of air bubbles and helps layers adhere better, which improves overall clarity.
6. Optimize Infill Settings
What to Do:
Set your infill to 100% for maximum clarity. Avoid patterns that might interrupt light passage, such as grid or honeycomb infills.
Why It Works:
100% infill creates a solid object with no air pockets, allowing light to travel straight through and improving transparency. Transparent prints look best when they are as close to solid as possible.
7. Thinner Walls
What to Do:
Use thinner walls, but be mindful that this might affect the structural integrity.
Why It Works:
Thinner walls reduce internal light scattering, making the print more transparent.
8. Experiment with Post-Processing
Post-processing can enhance the clarity of your print. Options include:
- Polishing: Sanding and polishing the surface can remove minor imperfections that scatter light.
- Clear Coat Finish: Applying a thin layer of clear resin or spray can give your print a glossy finish that improves light transmission.
- Heat Treatment: For advanced users, carefully applying heat can help smooth out the filament and improve transparency. However, this requires precision to avoid deforming the print.
Common Issues and How to Solve Them
Even with the right settings, you may encounter issues like slight cloudiness, layer lines, or microbubbles. To troubleshoot:
- Cloudiness: Check extruder temperature and ensure layers are compact by printing slowly and at a low layer height.
- Layer Lines: Sand and polish the outer surface.
- Microbubbles: Increase extruder temperature slightly and reduce cooling fan speed to minimize rapid cooling that traps air bubbles.
Frequently Asked Questions (FAQs)
u003cstrongu003eCan PLA prints be made truly clear?u003c/strongu003e
PLA can become semi-transparent but may never achieve complete clarity like PETG or T-Glase. For crystal-clear prints, PETG or polycarbonate are better choices.
u003cstrongu003eWhat is the best filament for transparent printing?u003c/strongu003e
PETG and T-Glase are top choices for transparent printing. Polycarbonate also yields excellent transparency but may require higher temperatures.
u003cstrongu003eWhy does my transparent filament print cloudy?u003c/strongu003e
Cloudiness often occurs due to trapped air bubbles, gaps between layers, or excessive cooling. Adjusting temperature, infill, and speed settings can help minimize cloudiness.
u003cstrongu003eShould I use a cooling fan for transparent prints?u003c/strongu003e
Generally, no. Reducing or turning off the cooling fan for transparent prints helps the filament bond more uniformly, reducing the cloudy effect.
u003cstrongu003eIs sanding necessary for transparent prints?u003c/strongu003e
Sanding is not essential but can improve clarity by smoothing out the outer surface and reducing visible layer lines.
Is there a way to make transparent filament more transparent?
Yes, it is possible to make transparent filament more transparent by following the process mentioned above – Practical Tips to Improve Transparency in 3D Printing
Conclusion
Achieving a clear, transparent print from transparent filament is possible with the right techniques. Remember to use the right filament, adjust your layer height, extruder temperature, and print speed, and minimize cooling.
With some patience and experimentation, you can produce prints that are closer to glass-like clarity.
When in doubt, consult with professionals or experienced users for personalized advice. Happy printing!
Related posts:
 How to Choose the Best 3D Printing Filament for Home Decor
  How Much 3D Printer Filament Do I Need? A Practical Guide
  How 3D Printer Filament Is Made: A Behind-the-Scenes Look
  3D Printer Filament Compatibility Guide 2025: Top Picks CFPLA, TPU, Nylon, PETG, ABS, PC, Wood PLA & More
  The Ultimate Guide to Advanced 3D Printing Filaments: Unlocking Properties, Real-World Uses, and Pro Secrets
  45 Best Filaments for 3D Printing 2025
  Prime Day 2025: 100 Essential 3D Printer Upgrades and Filament Deals for Every Maker
  Complete 3D Printing Starter Kit Under $400 Total: Everything You Need This Black Friday
  Black Friday Filament Deals 2025: Stock Up and Save 40%+
  Best Cyber Monday Filament and Resin Deals 2025: Save Up to 47% Today
  3D Printing Filament Color Reference: Variables That Affect Appearance
  The Complete 3D Printer Filament Guide: Technical Data, Brand Analysis & Scientific Research (2025)